SharePoint Output Guide
This is a guide on how you can output any Runthru document and publish it to SharePoint. It will explain how to:
Access the SharePoint Output
Publish as a Microsoft Word or Publish as a Microsoft PowerPoint
Publish a Site Page
And other Useful Tips for Publishing a Site Page
Access the SharePoint Output
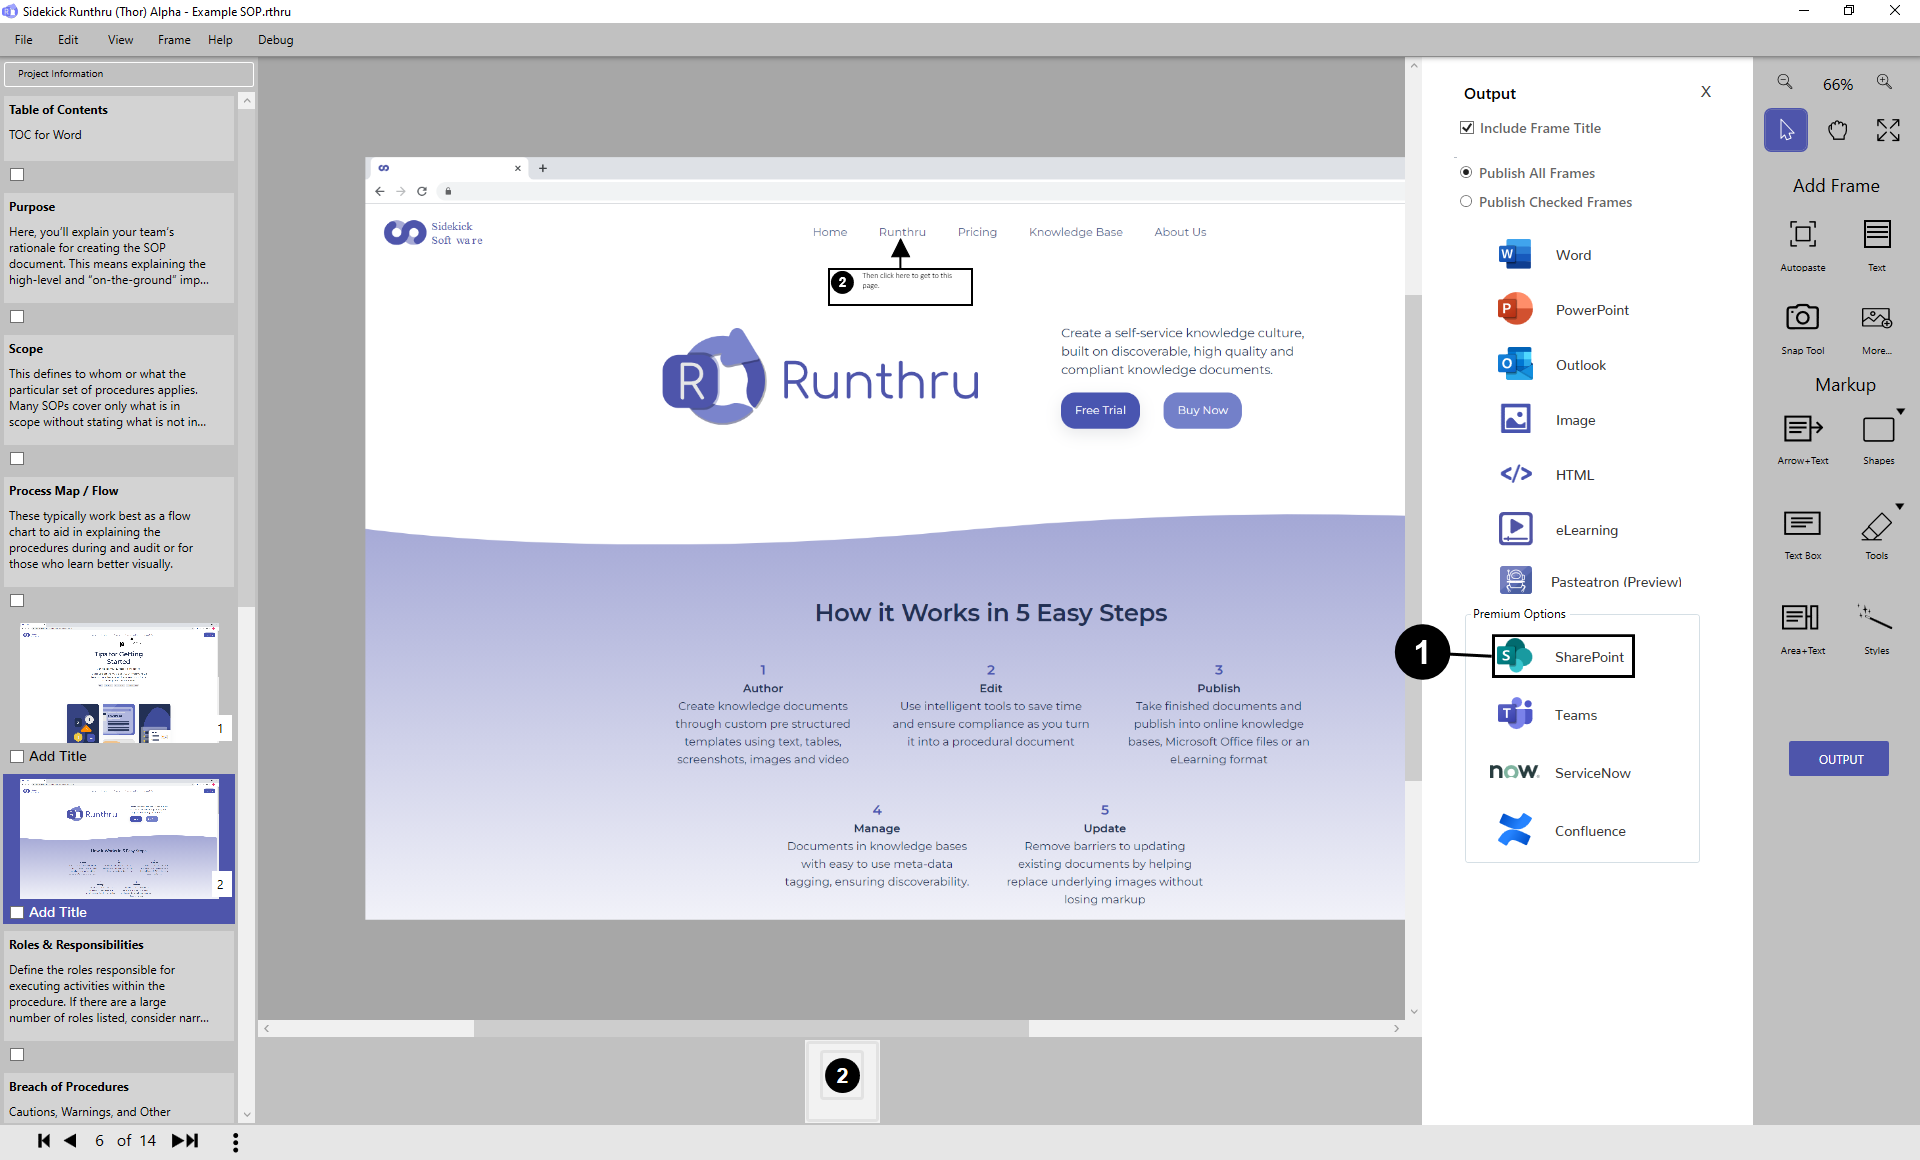

Click here to output to 'SharePoint'.

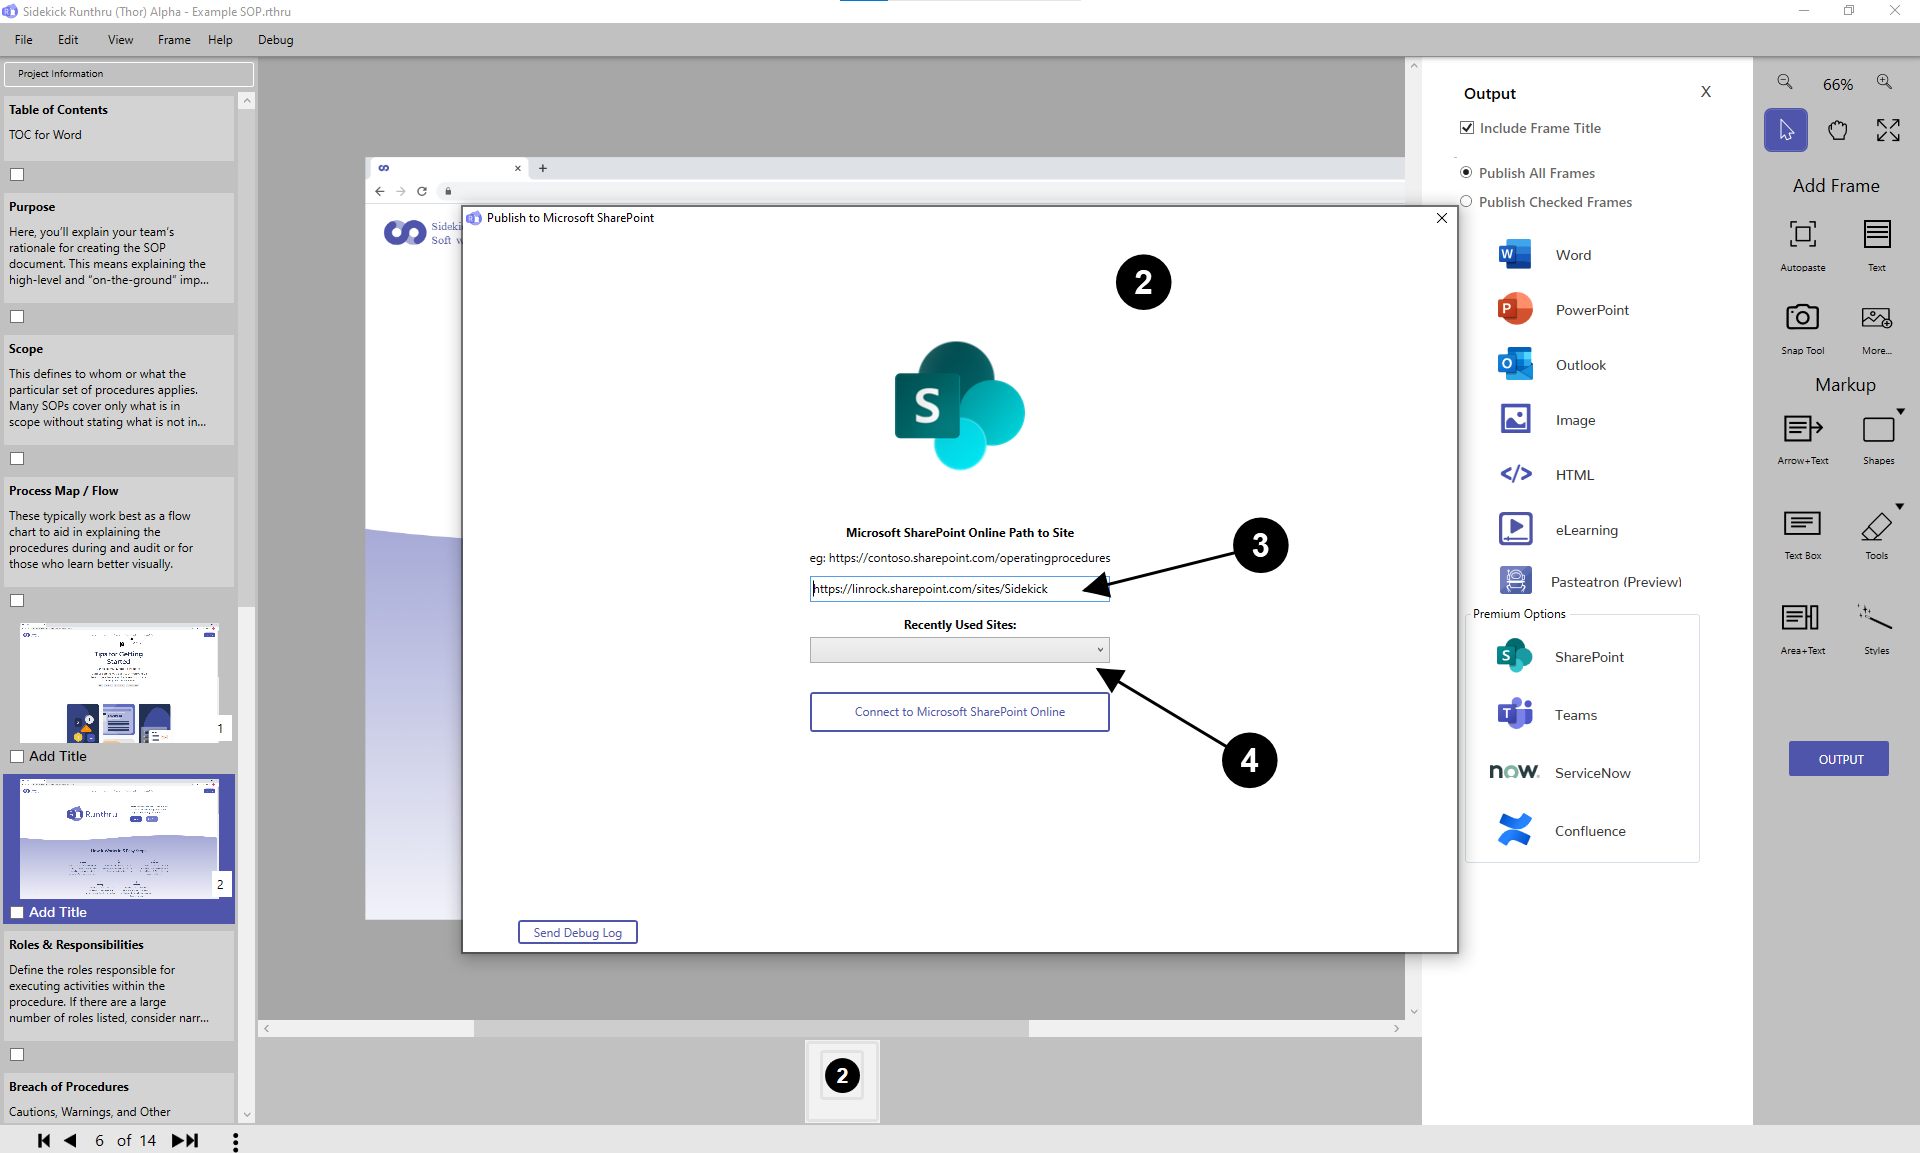

Firstly, you need to login to SharePoint.

Here is a particular site in your SharePoint online tenancy. There may be only one or many sites depending on how your SharePoint Administrator set up your environment.

Any recently used sites will be shown here.
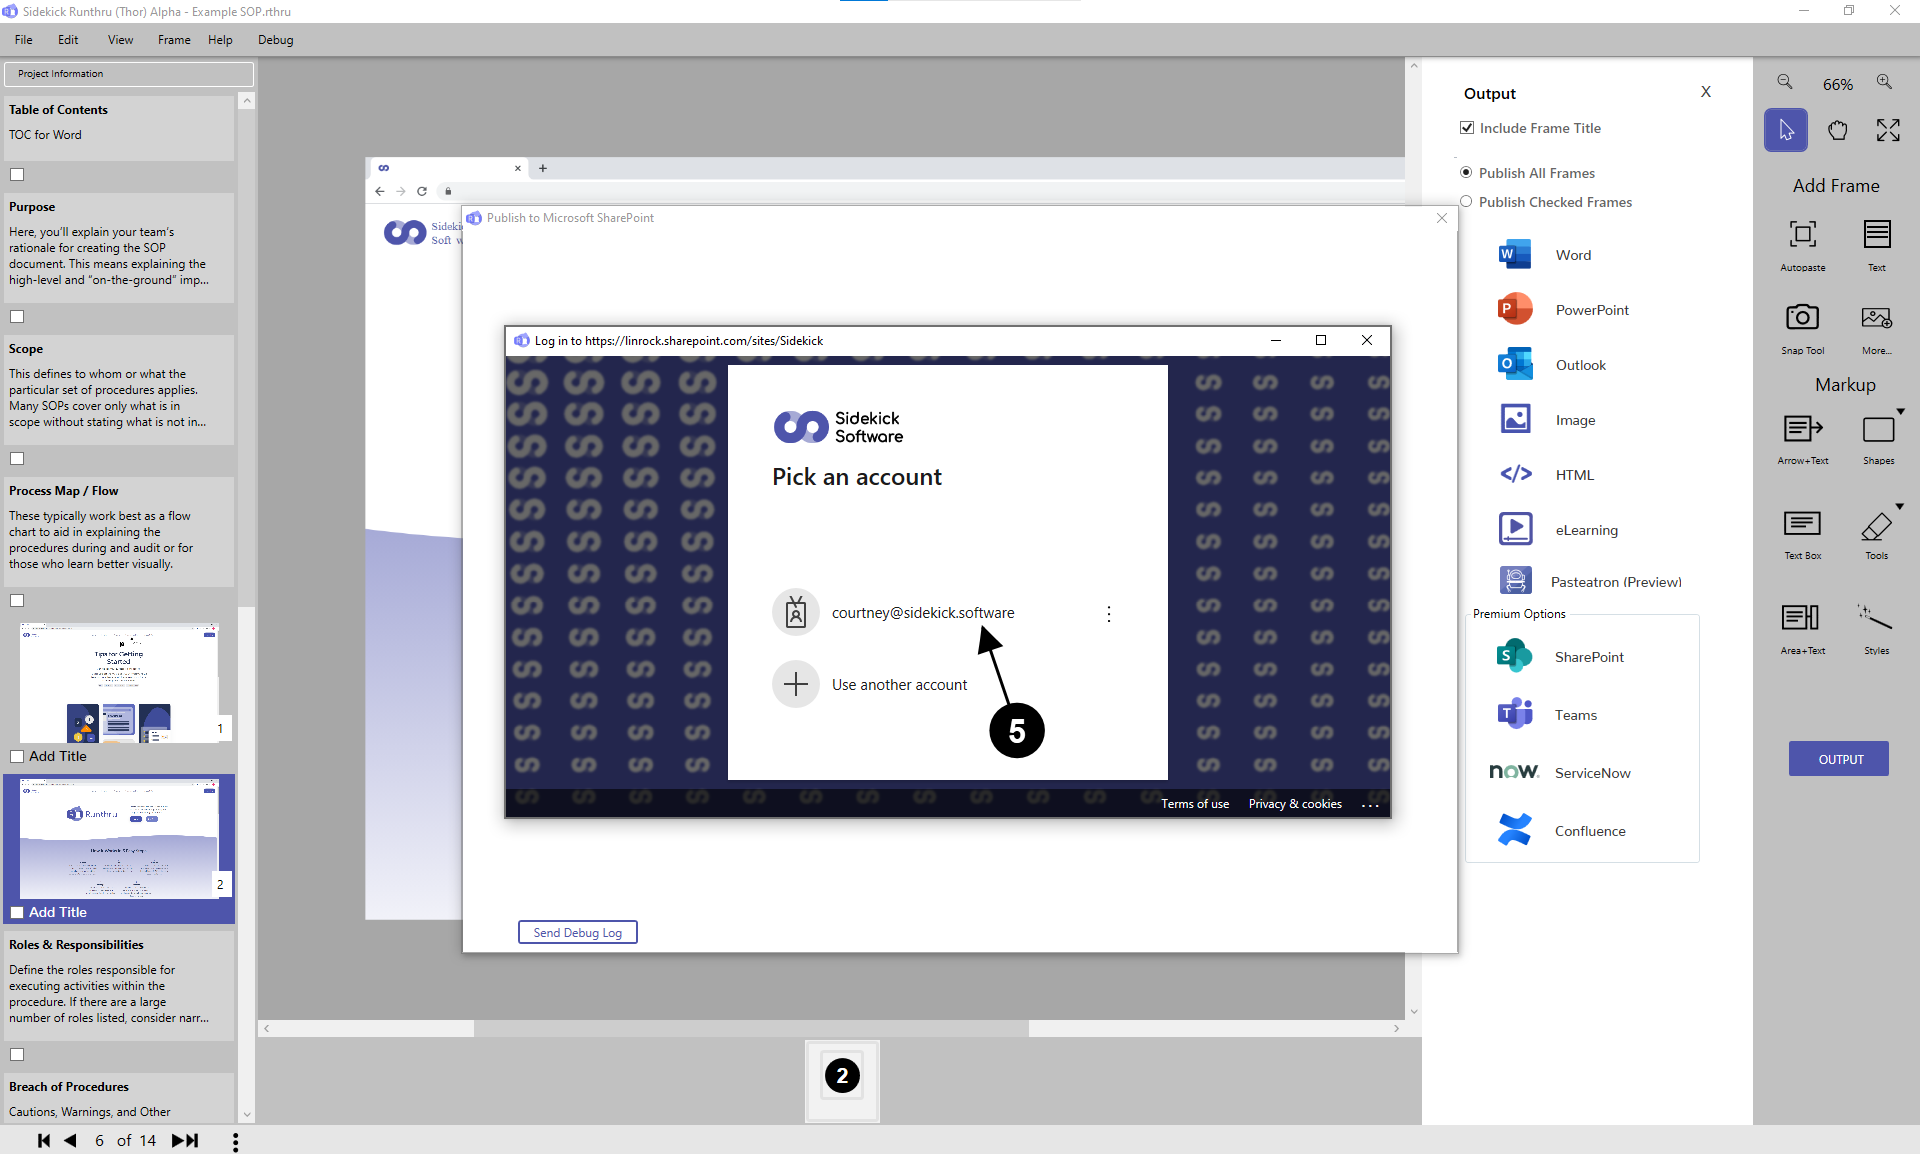

Sign in with your Microsoft Office 365 Login. This may also include two-factor authentication if you have set this up to login to Microsoft Office 365.
Publish Microsoft Word & Publish Microsoft PowerPoint
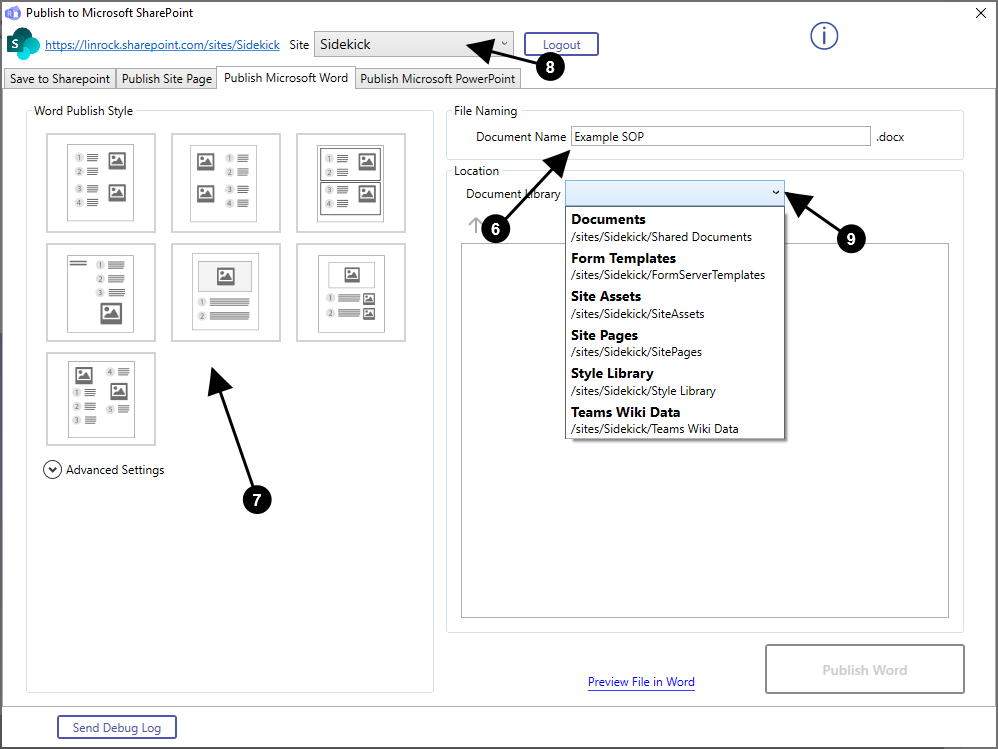

For 'Publish Microsoft Word' and 'Publish Microsoft PowerPoint'.

Type in a document name.

Choose a format. The format of the outputs are exactly the same as directly outputting from Runthru to Word or PowerPoint.

Choose the particular site you want to publish to.

Click on a specific document library to display folders.
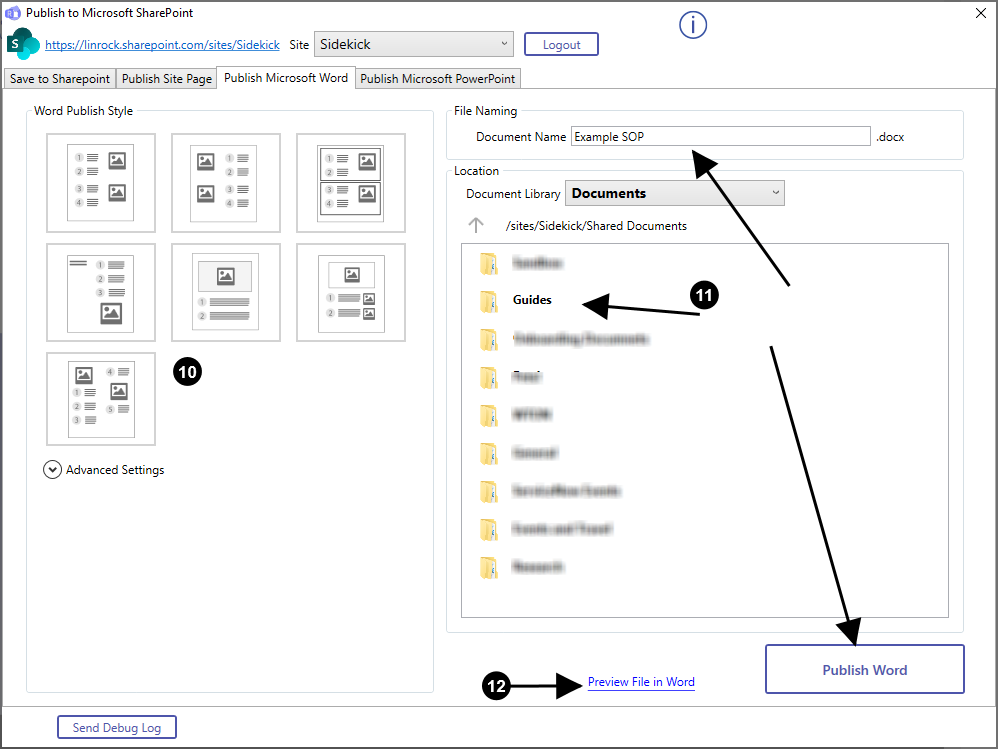

Choose a format for the word document.

Name, click, and save into a folder or the root directory of the document library.

Preview the File with a normal Runthru output.

For 'Publish Microsoft Word' and 'Publish Microsoft PowerPoint'.
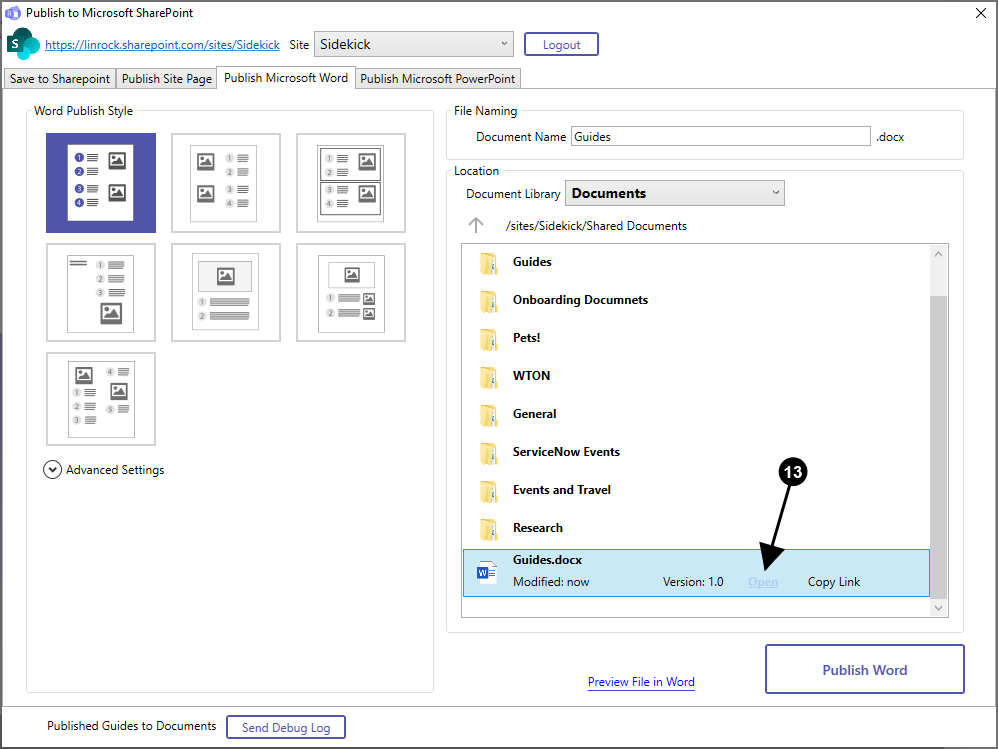

Once you have published to Word you can 'Open' or 'Copy Link' (e.g. if you need to email the document).
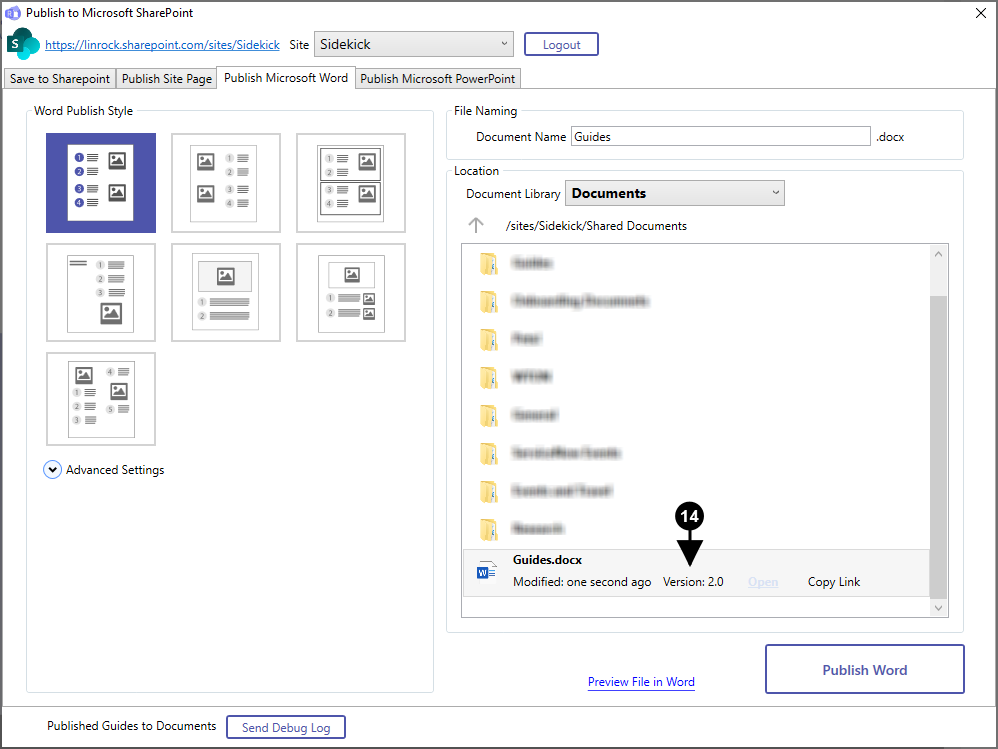

If you re-publish the same document then it will change from 'Version 1.0' to 'Version 2.0'.
Publish Site Page
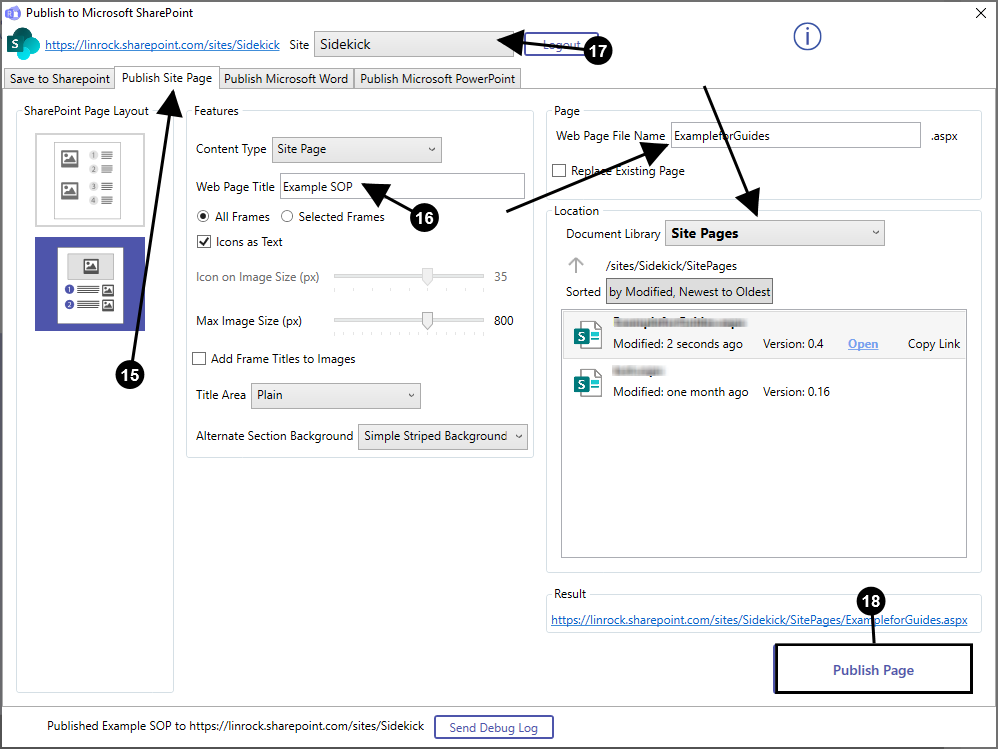

Runthru's SharePoint integration also builds Modern Site Pages.

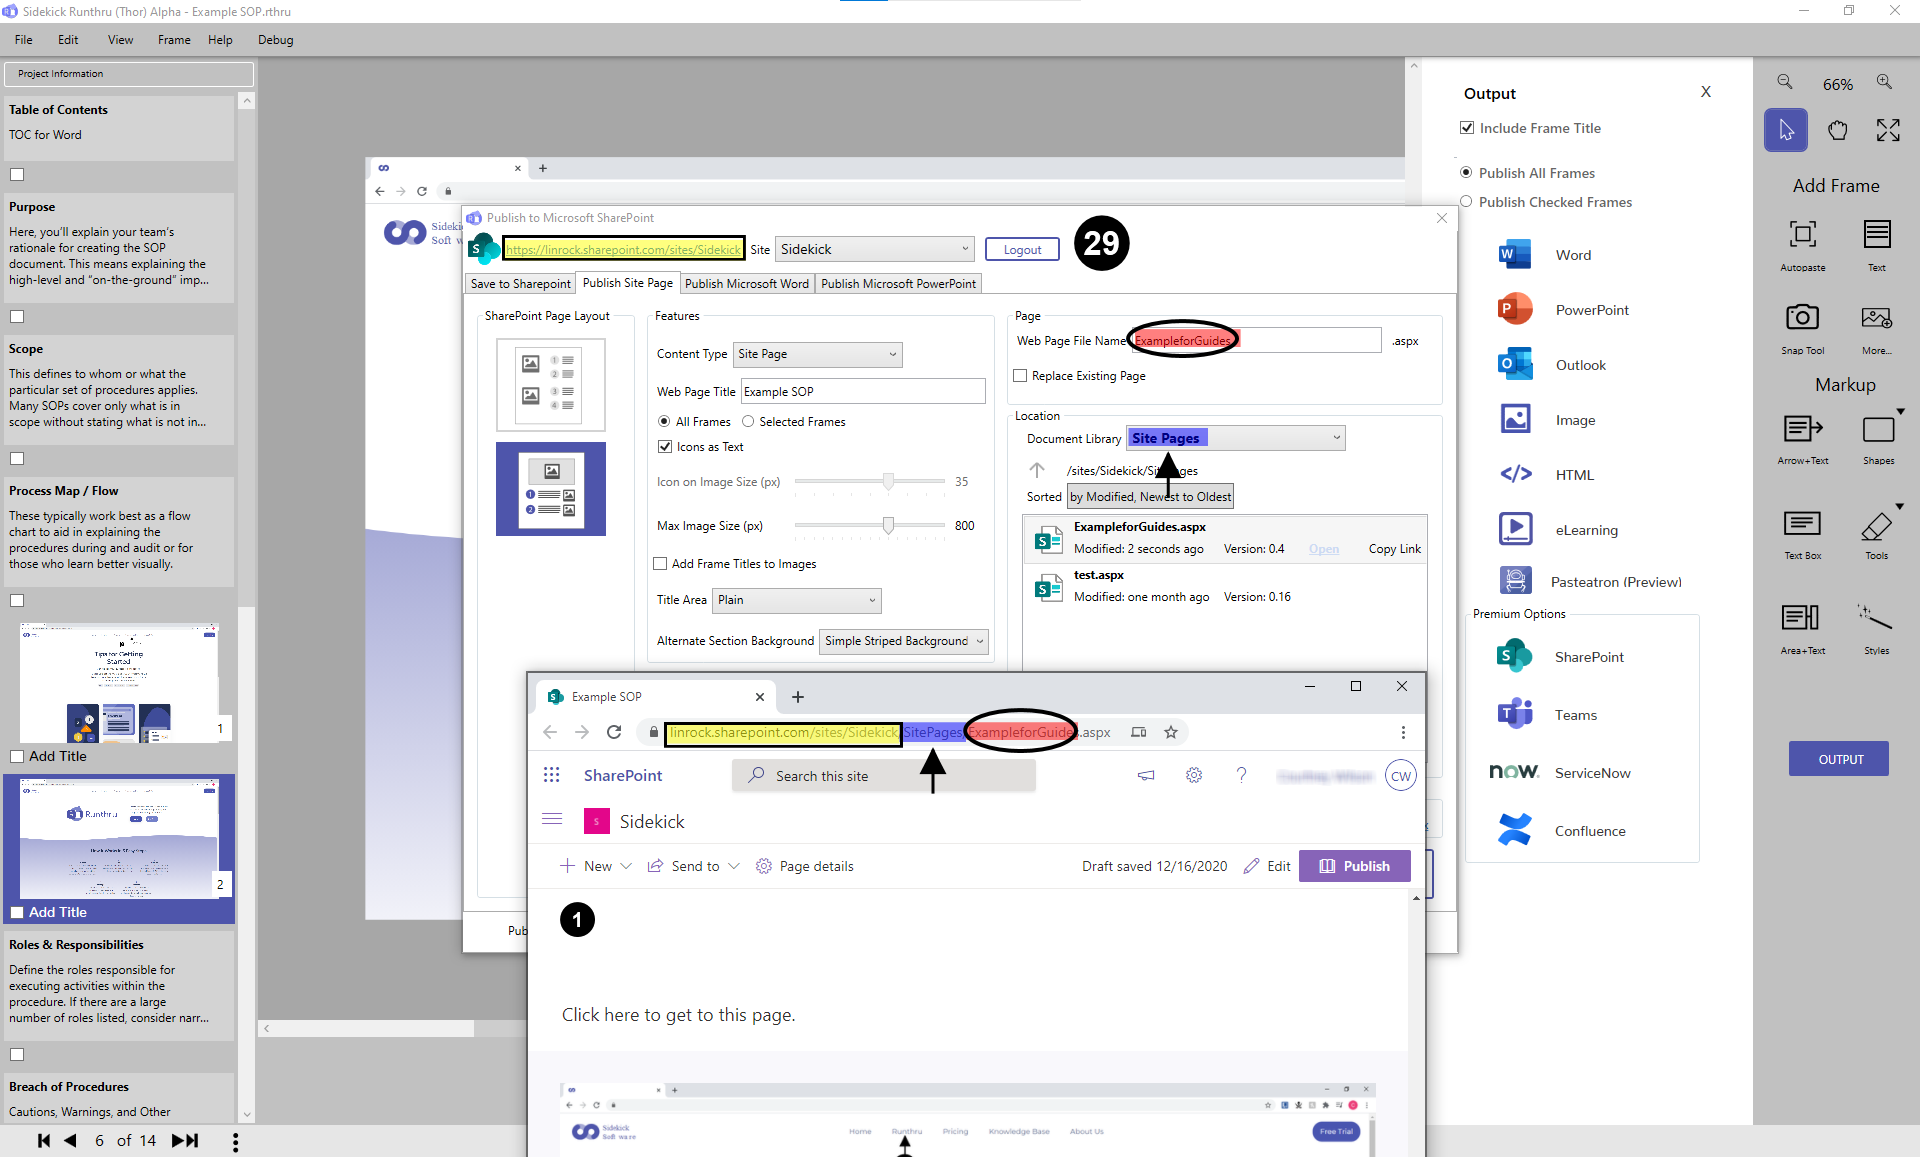
Click on 'Publish Site Page'.

Name the 'Web Page' (title at top of site) and 'Web Page File Name' (what appears in the file system).

Choose the appropriate 'Site' page and 'Document Library'.

Then, click on 'Publish Page'.
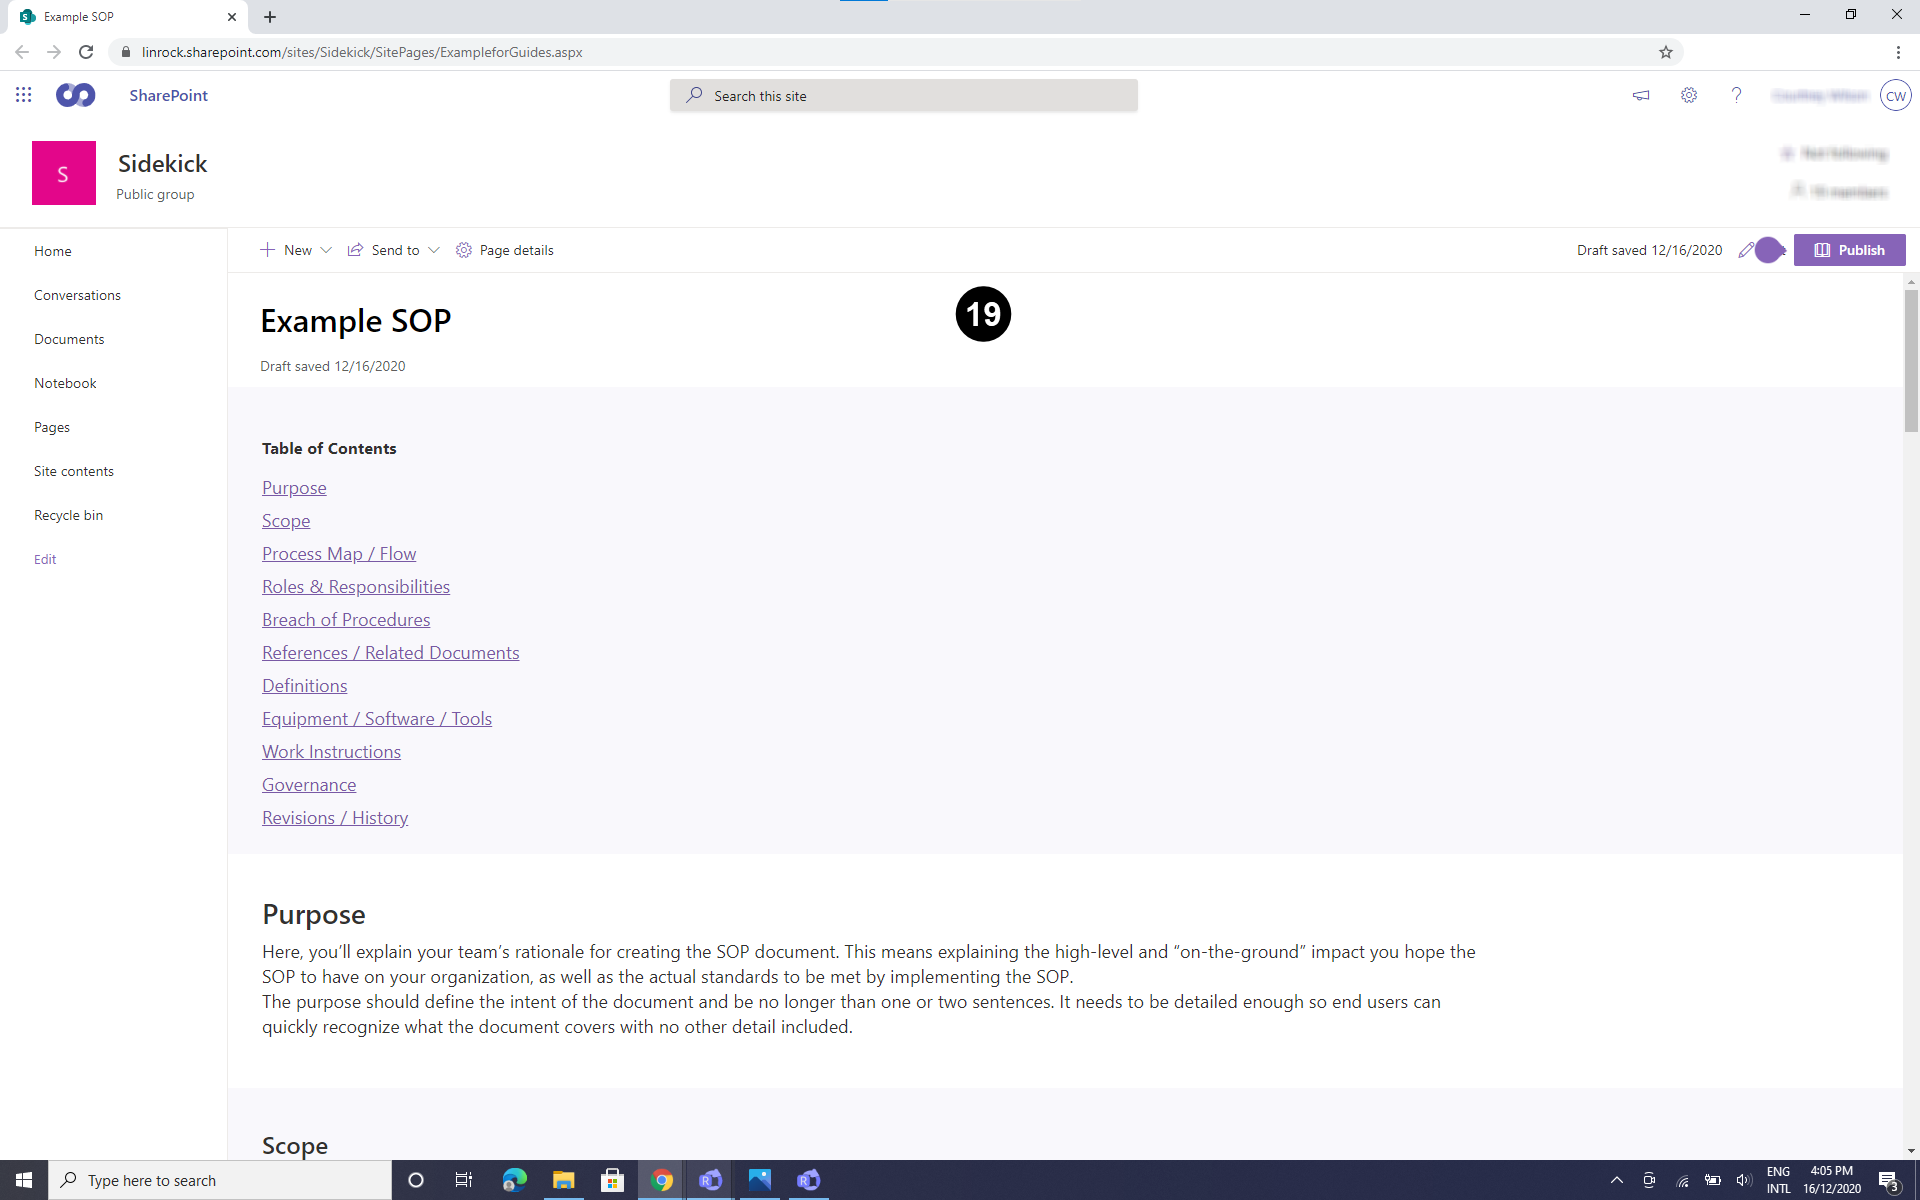

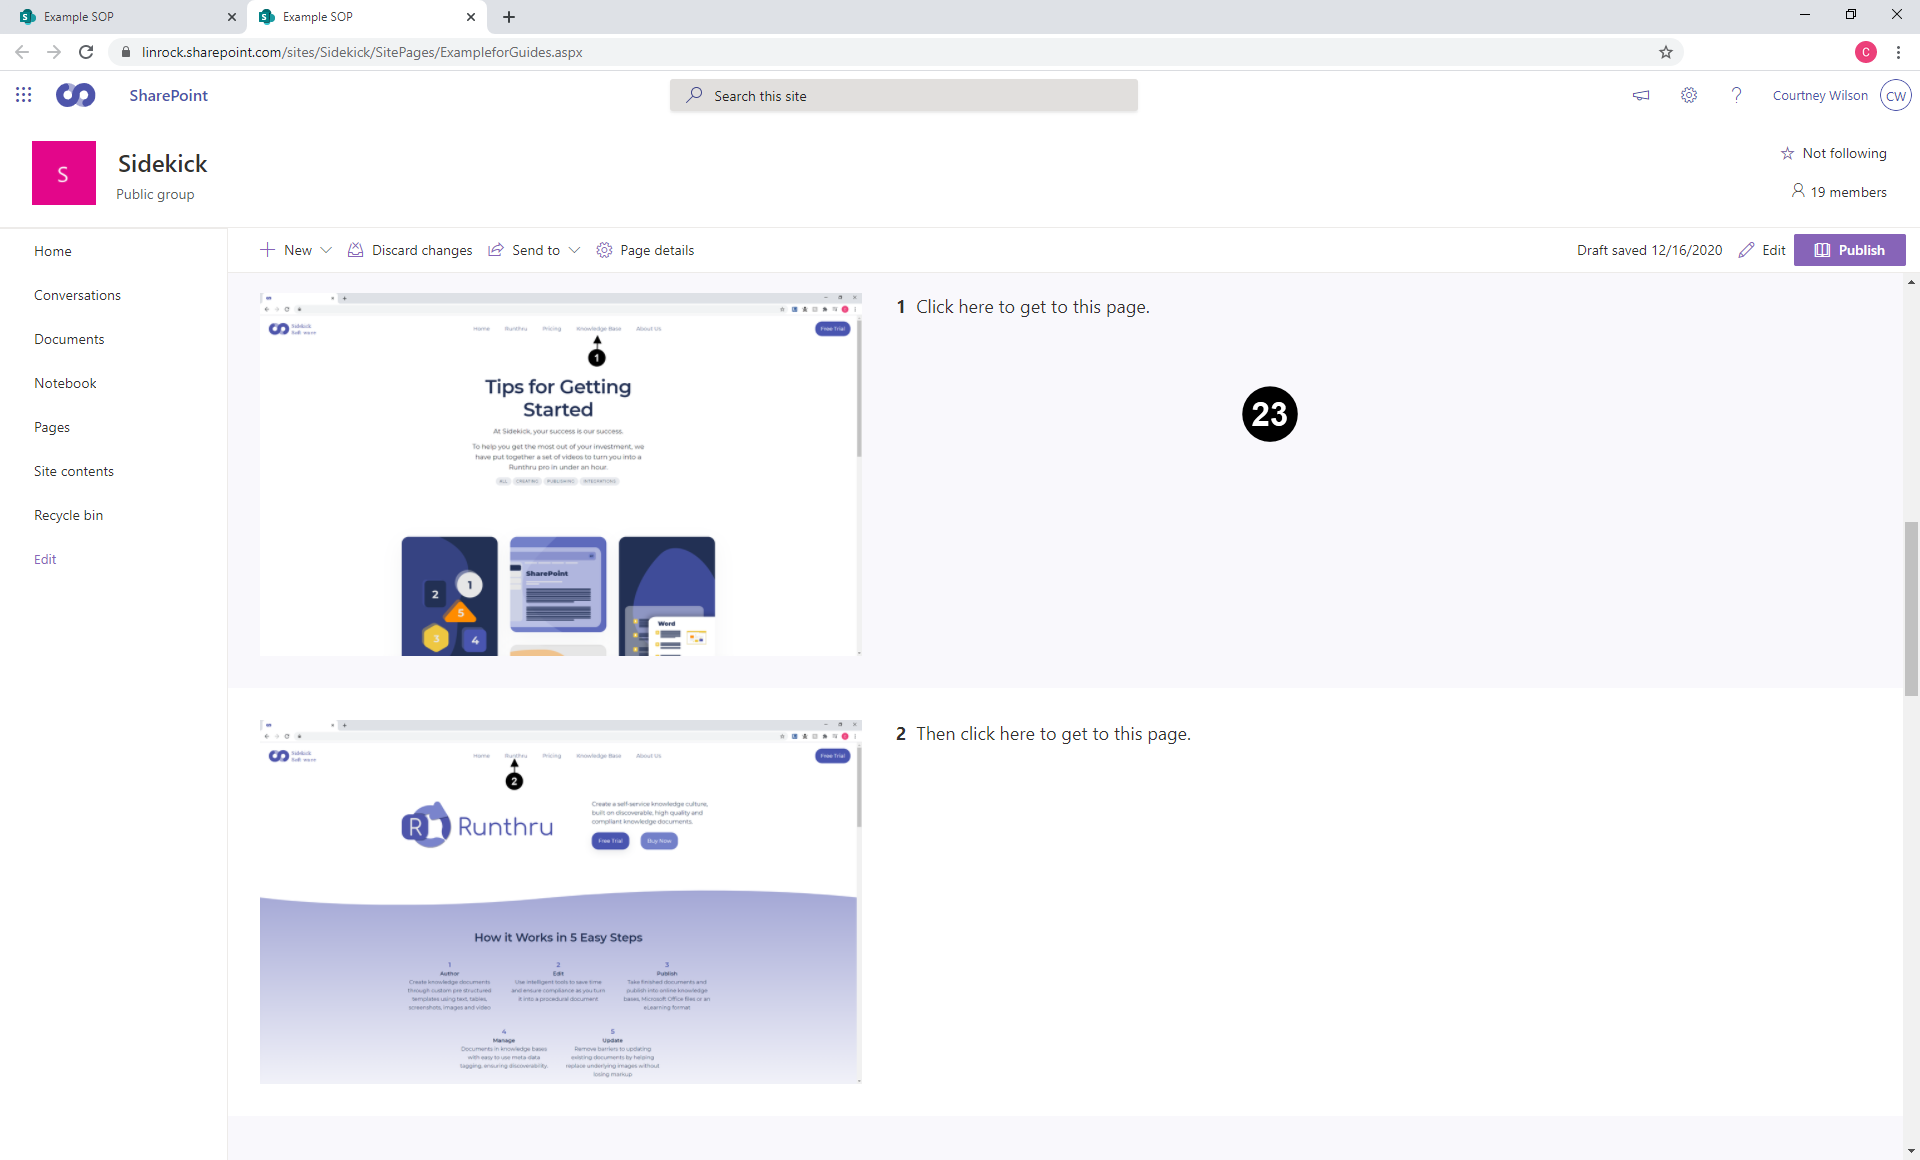
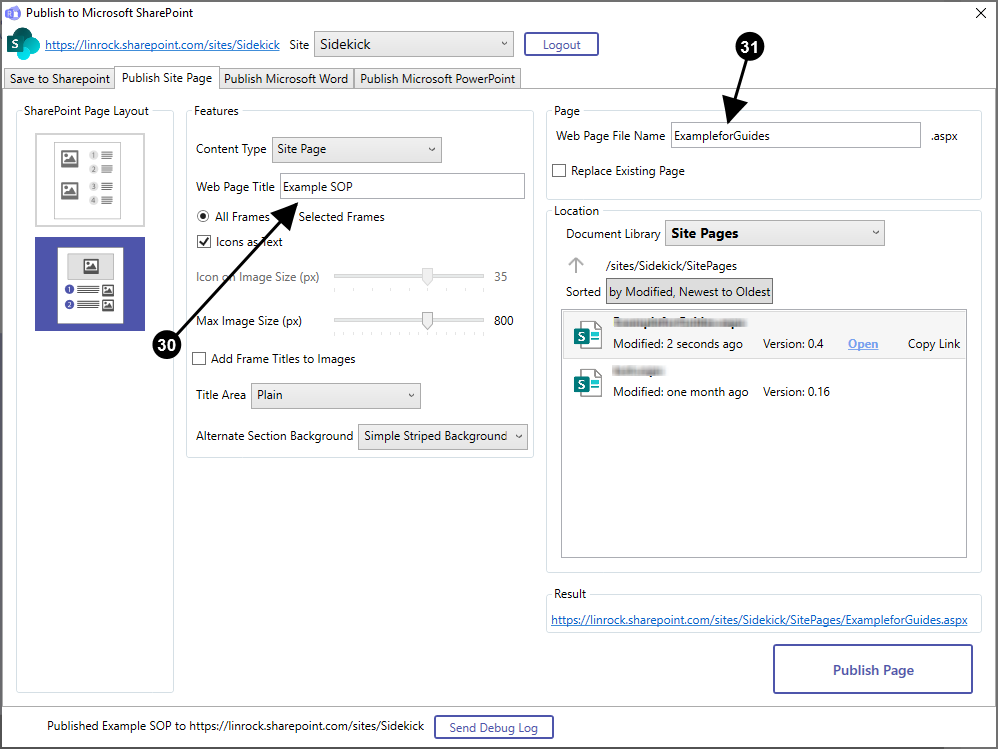
Here is the modern site page.
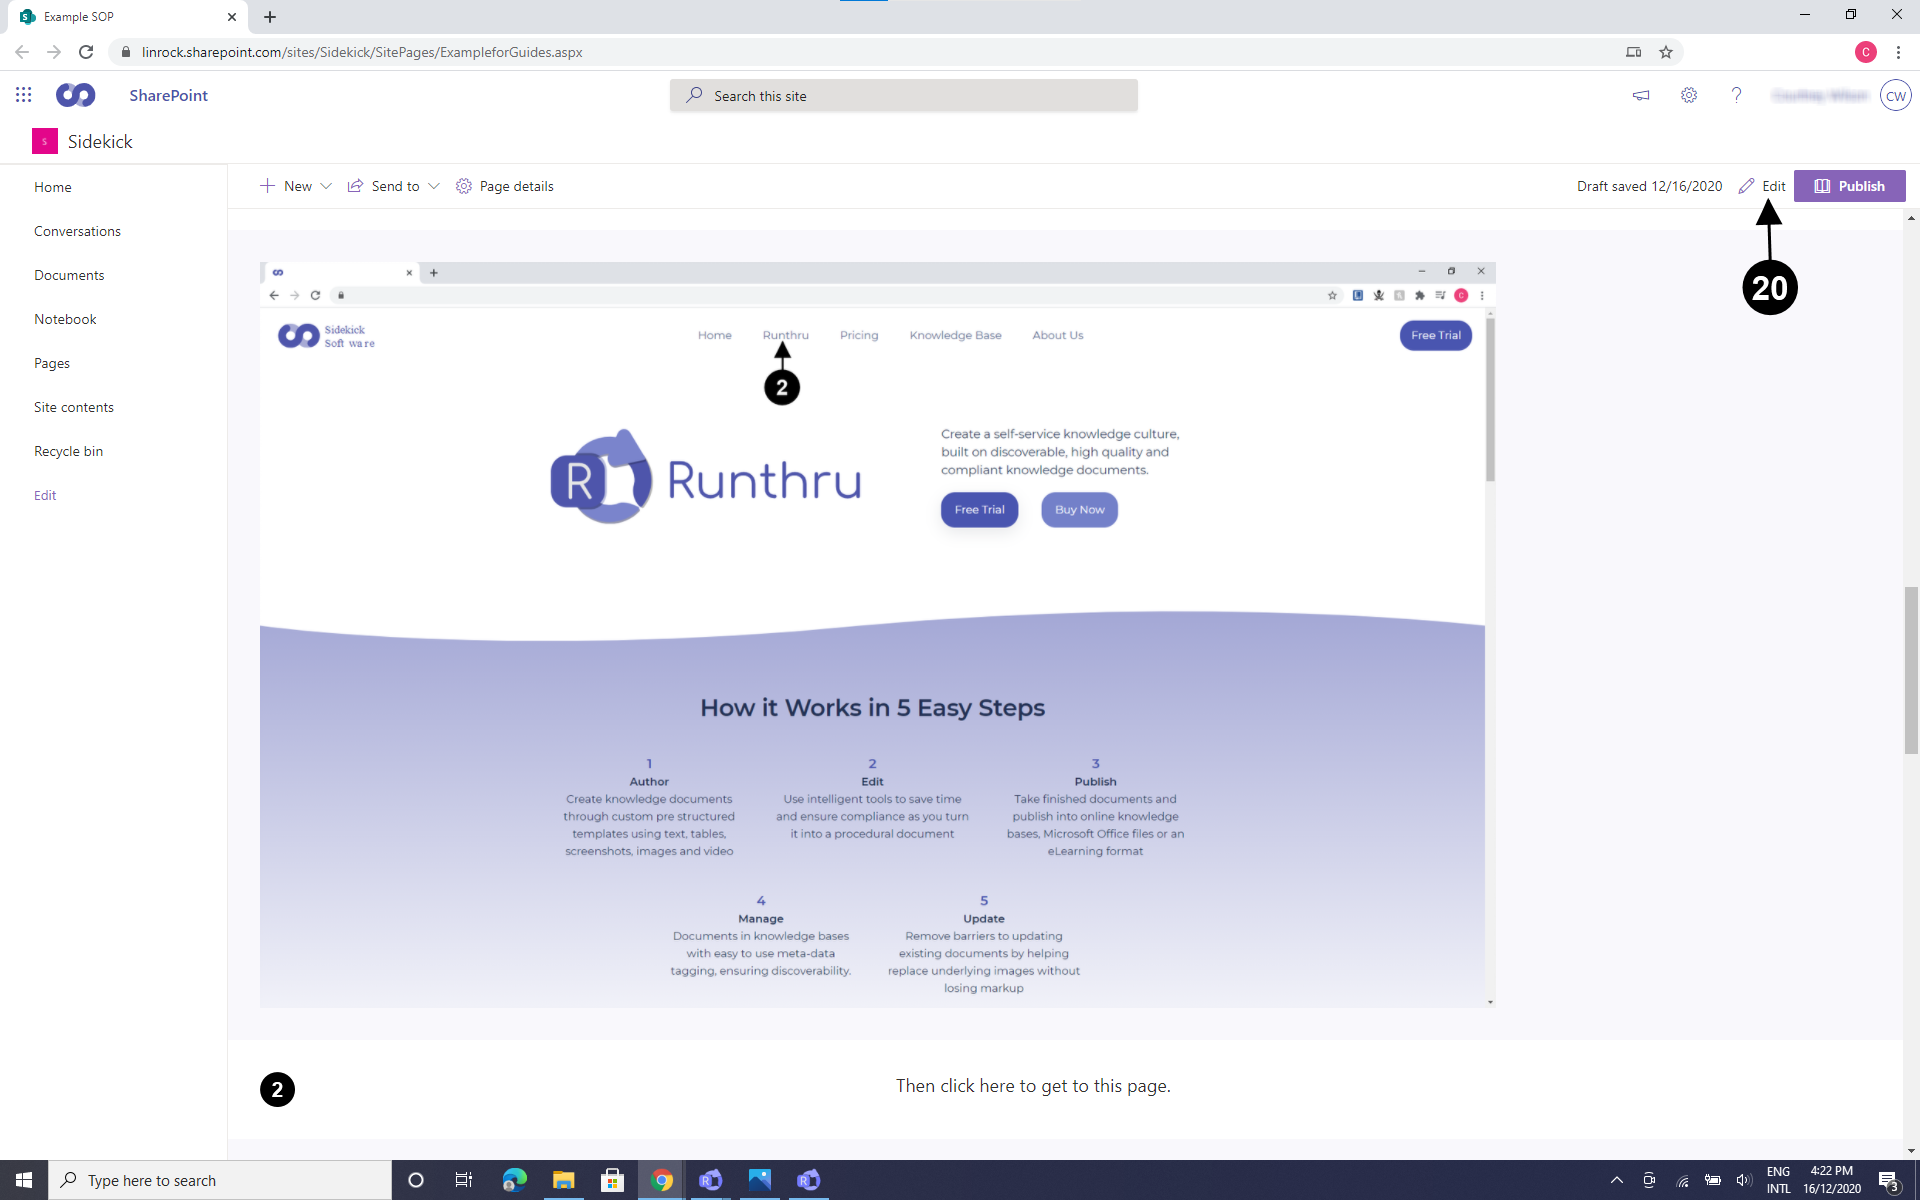

Click here to edit your Site Page.

This allows you to edit after the fact.
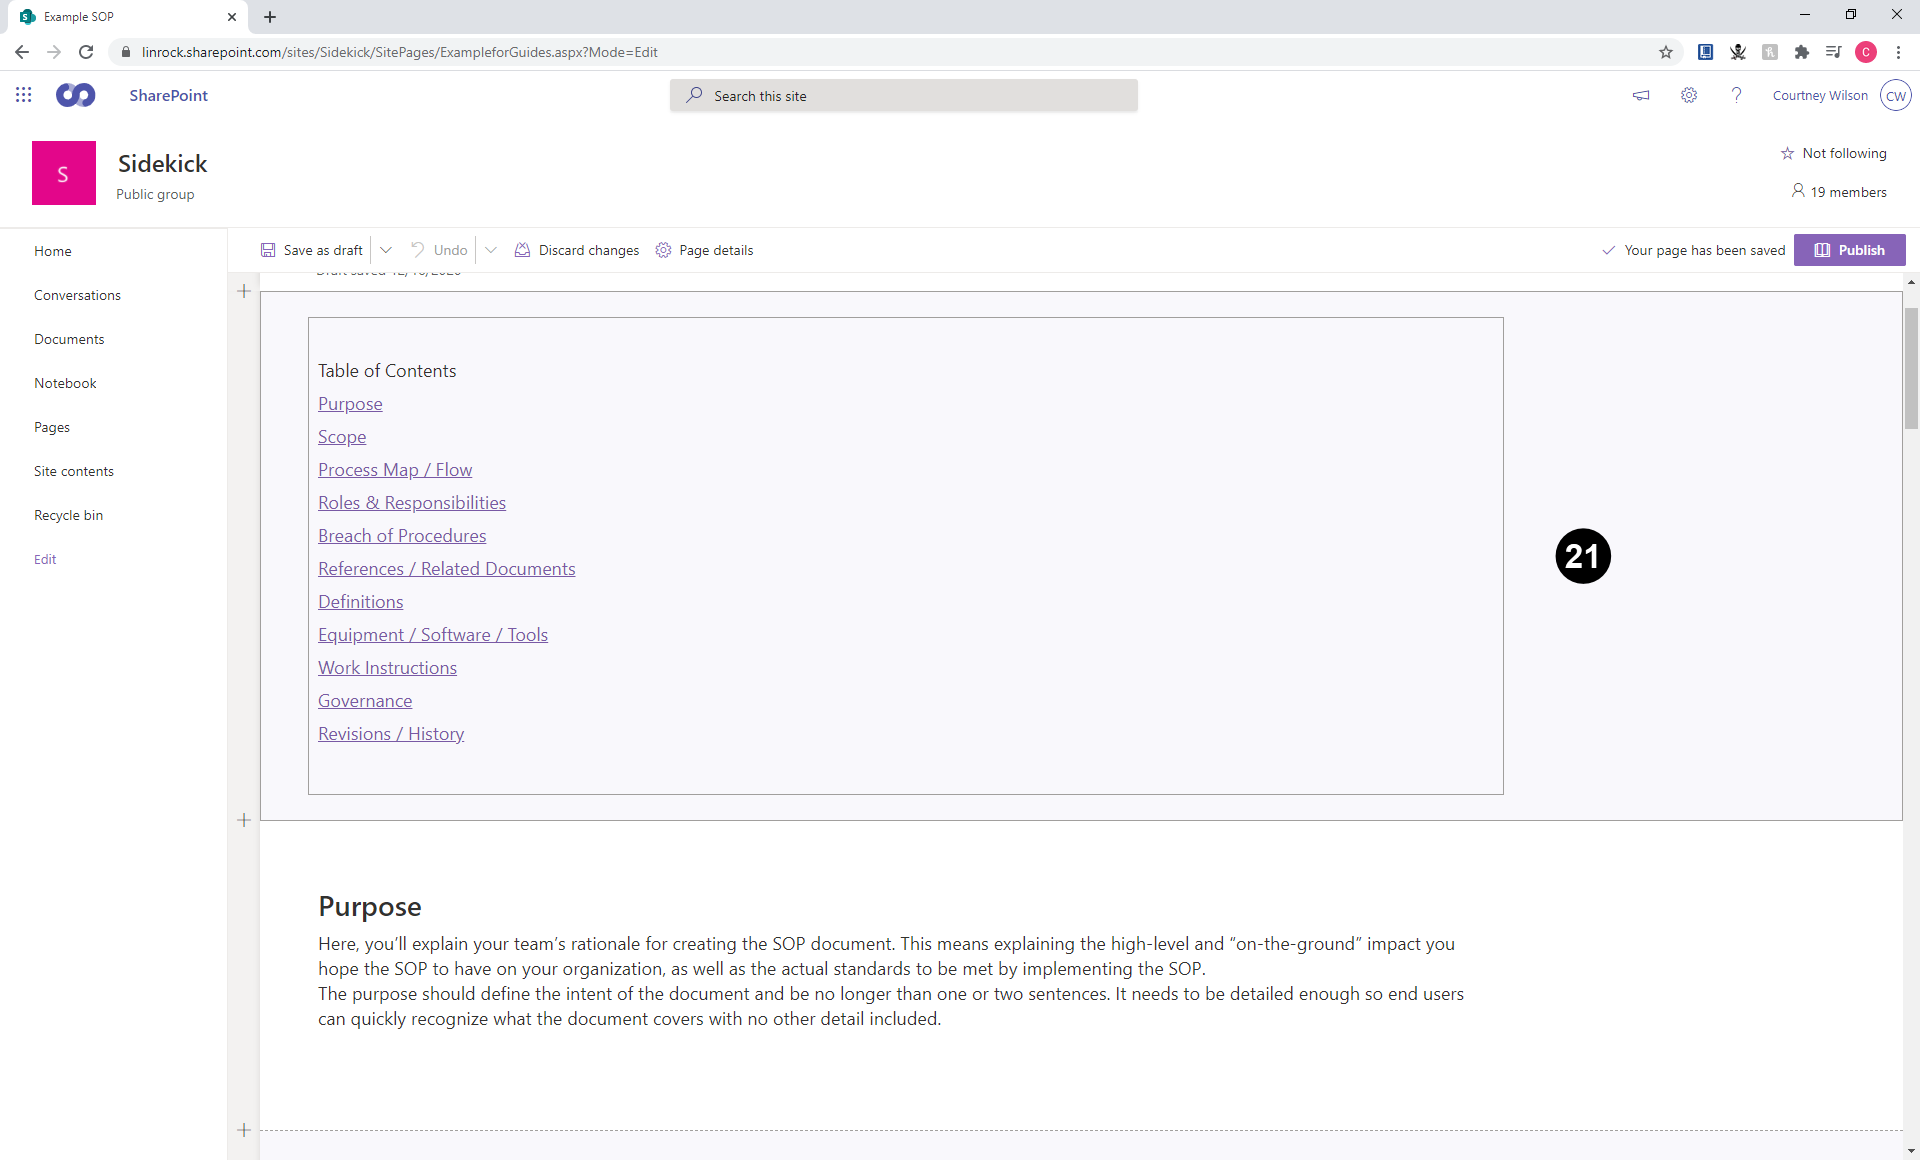
This image also shows how you edit in sections (the 'Table of Contents' section is currently being edited).
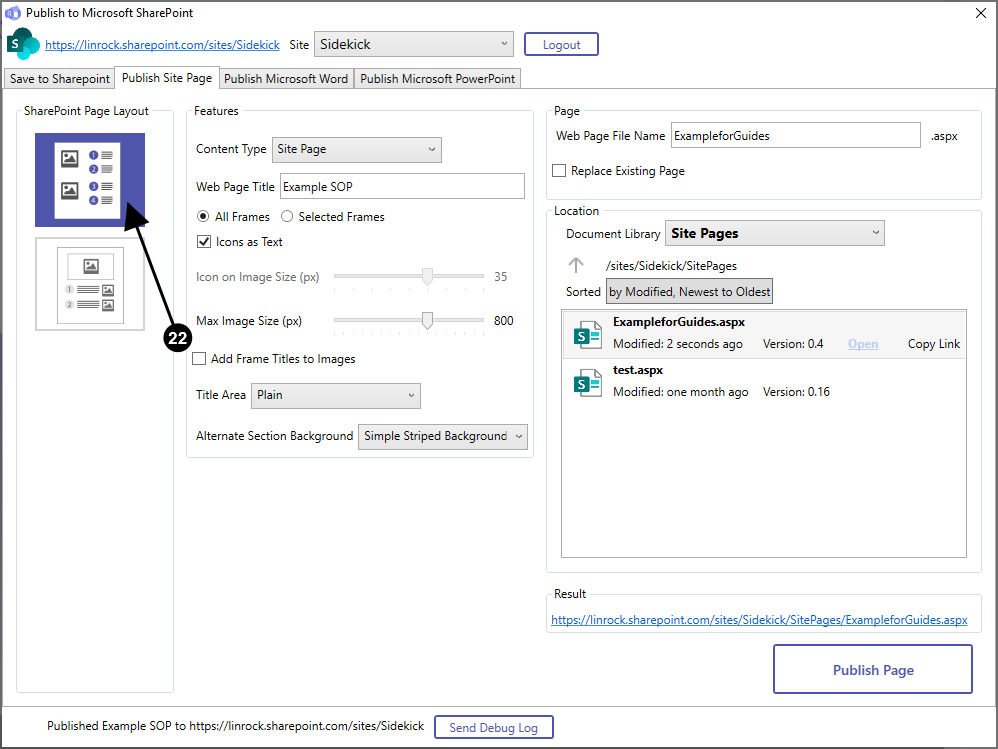

Click on this format. It will output the ~/img/help/SharePoint and text next to each other vertically.

Here is an example of the format which makes the image and text next to each other.
Compared to the other format the ~/img/help/SharePoint are smaller, but horizontal space is saved.
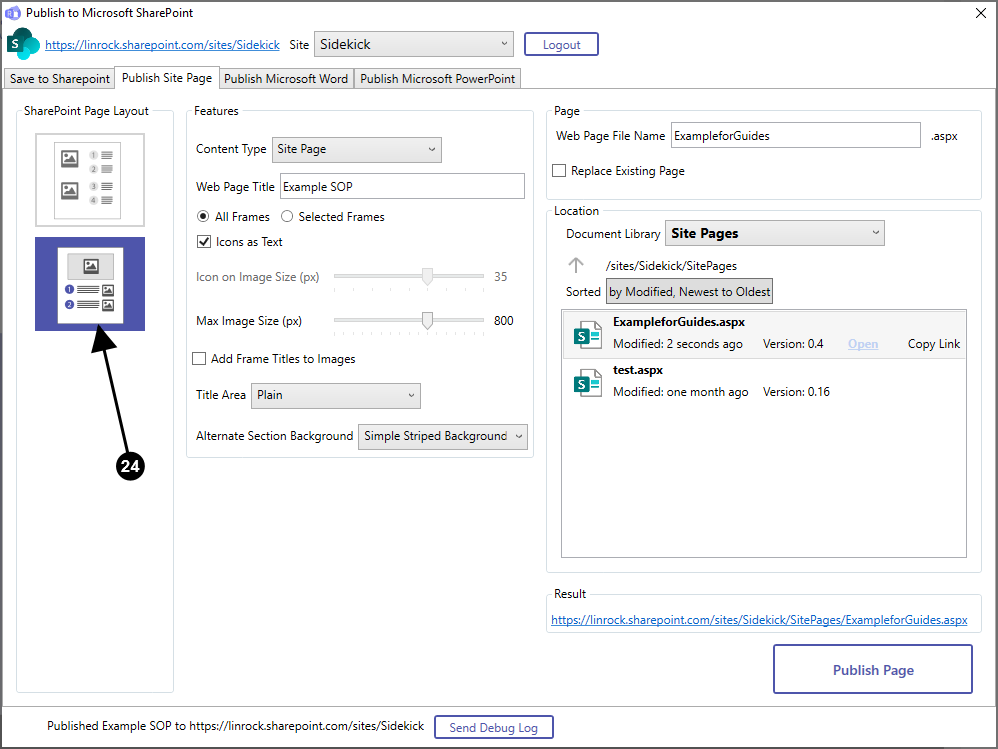

Click on this format. It will output the text below the ~/img/help/SharePoint.


This is an example of the output with the text below the ~/img/help/SharePoint.
Compared to the other output the image is larger and the text is underneath.
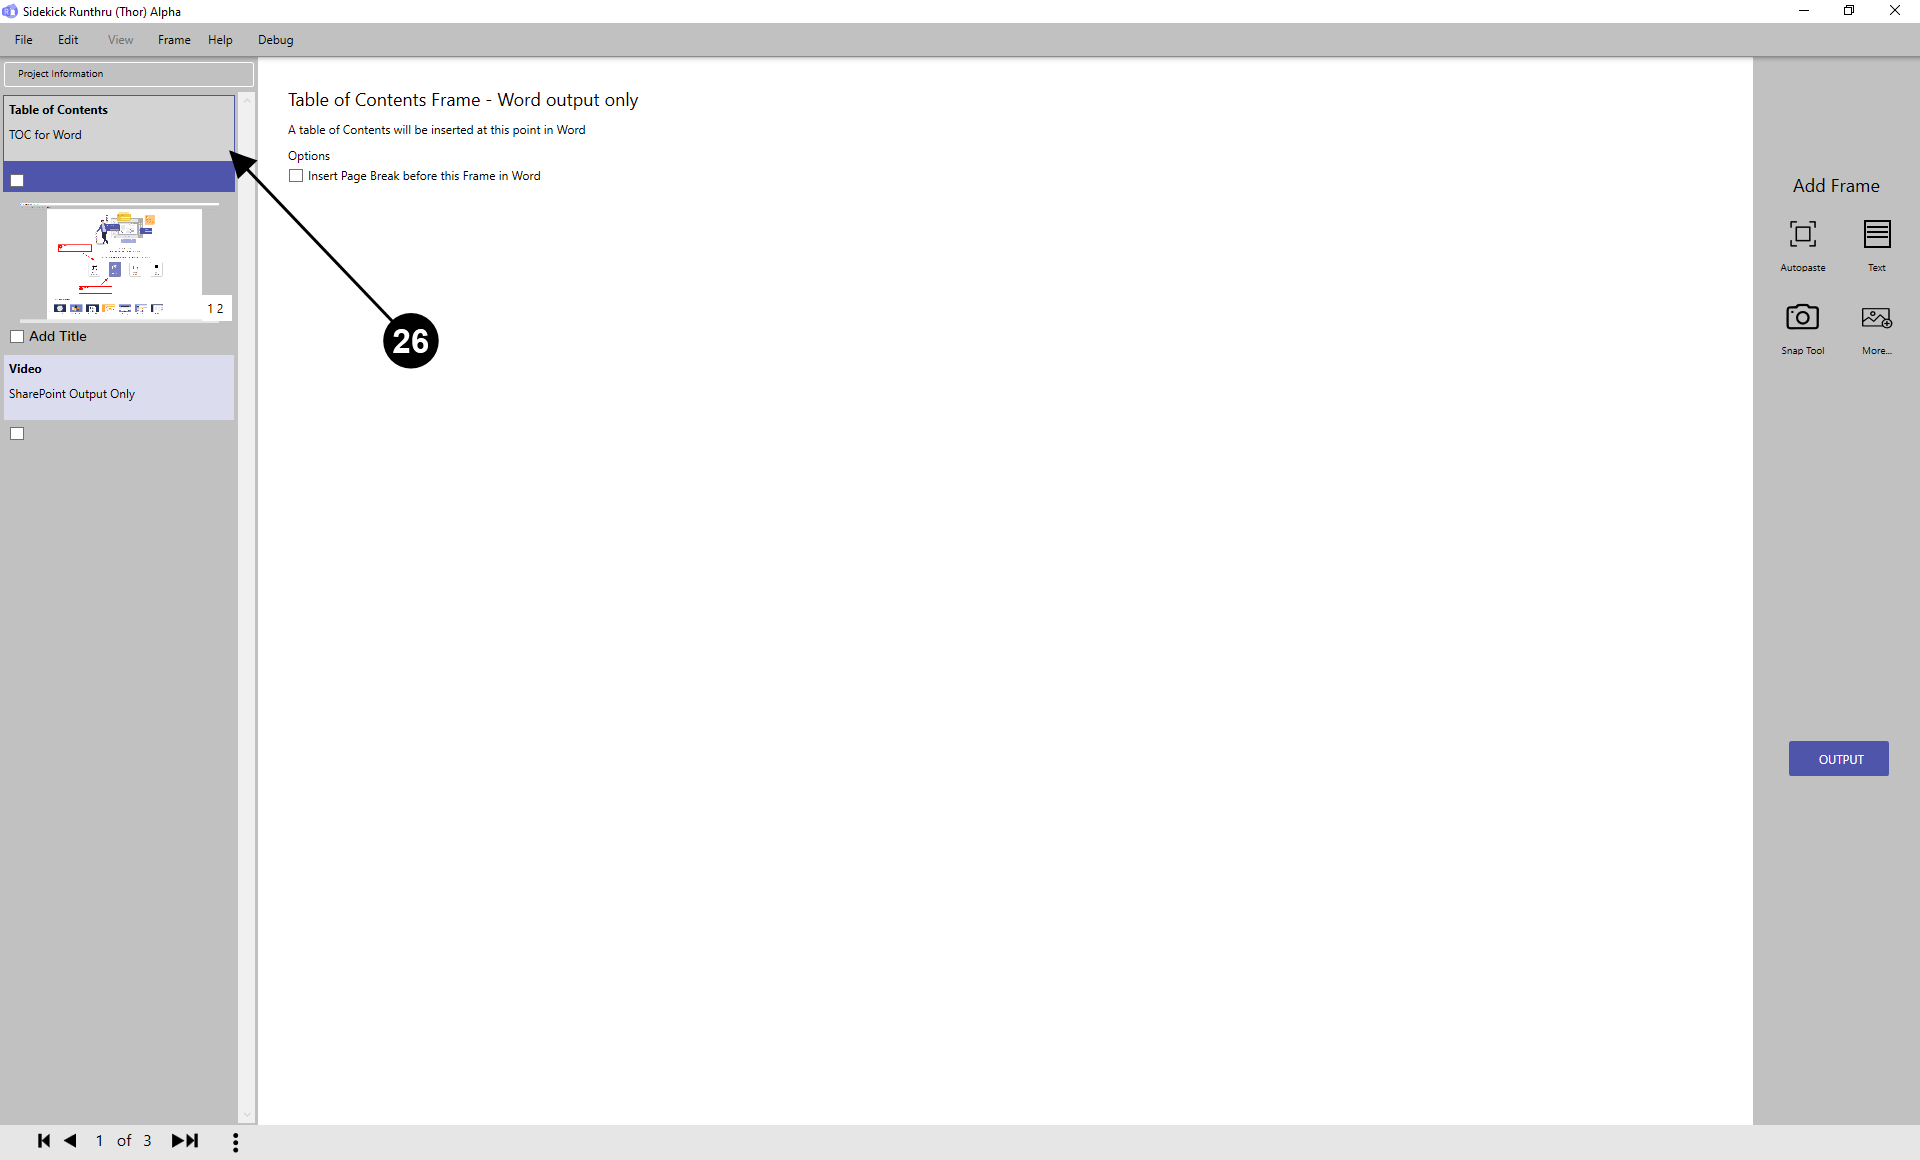

The 'Table of Contents' will be automatically generated and placed at the top of the Modern Site Page.


Here is an example of a 'Table of Contents' that has been outputted into SharePoint.
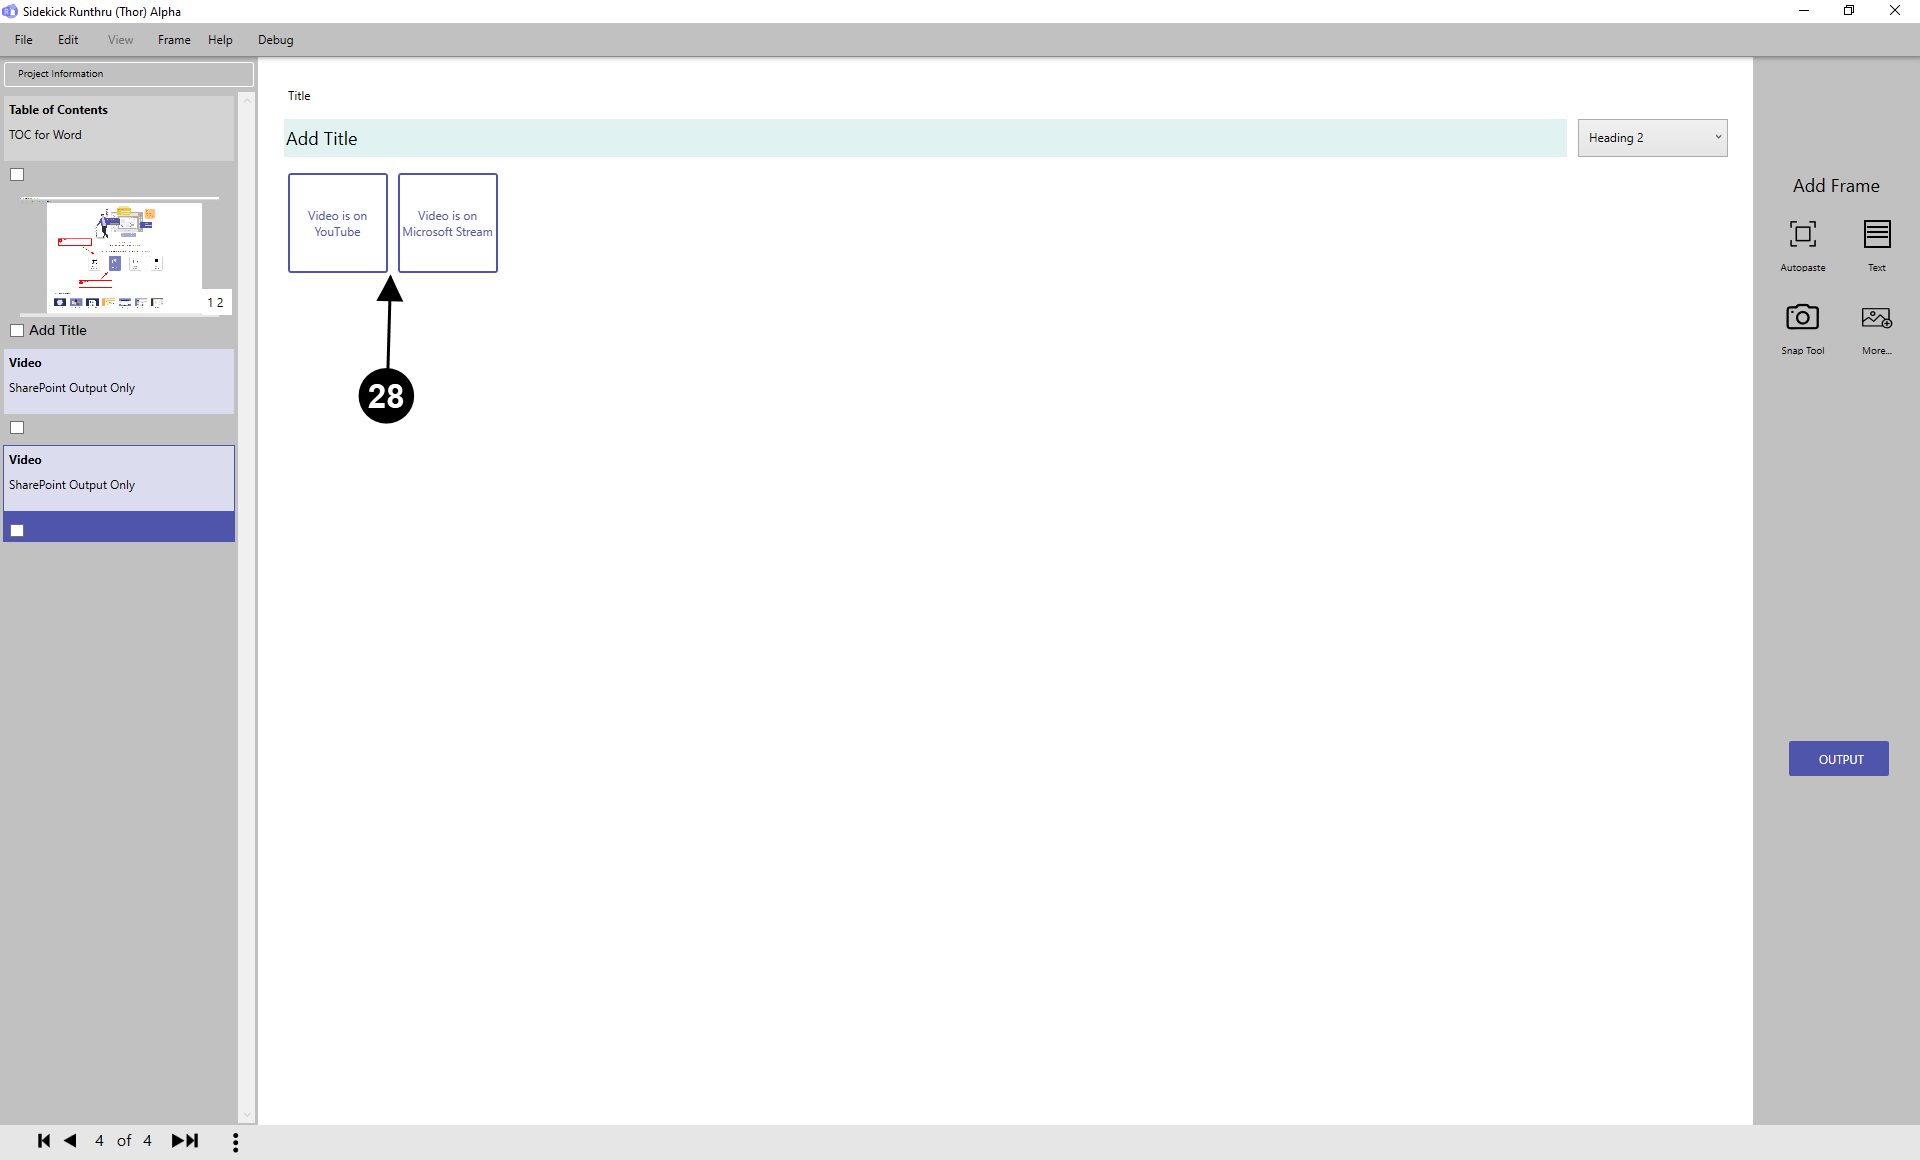

You can also add videos from Microsoft Stream or YouTube that output into SharePoint.
Other Useful Tips for Publishing a Site Page

Here is how the Publish window is translated into the URL of the site page.

Appears as the title of the published document.

What appears in the file system.


Puts the title of the frame at the top of the image. The circle shows the text that will be shown if 'Add Frame Titles to ~/img/help/SharePoint' is clicked.
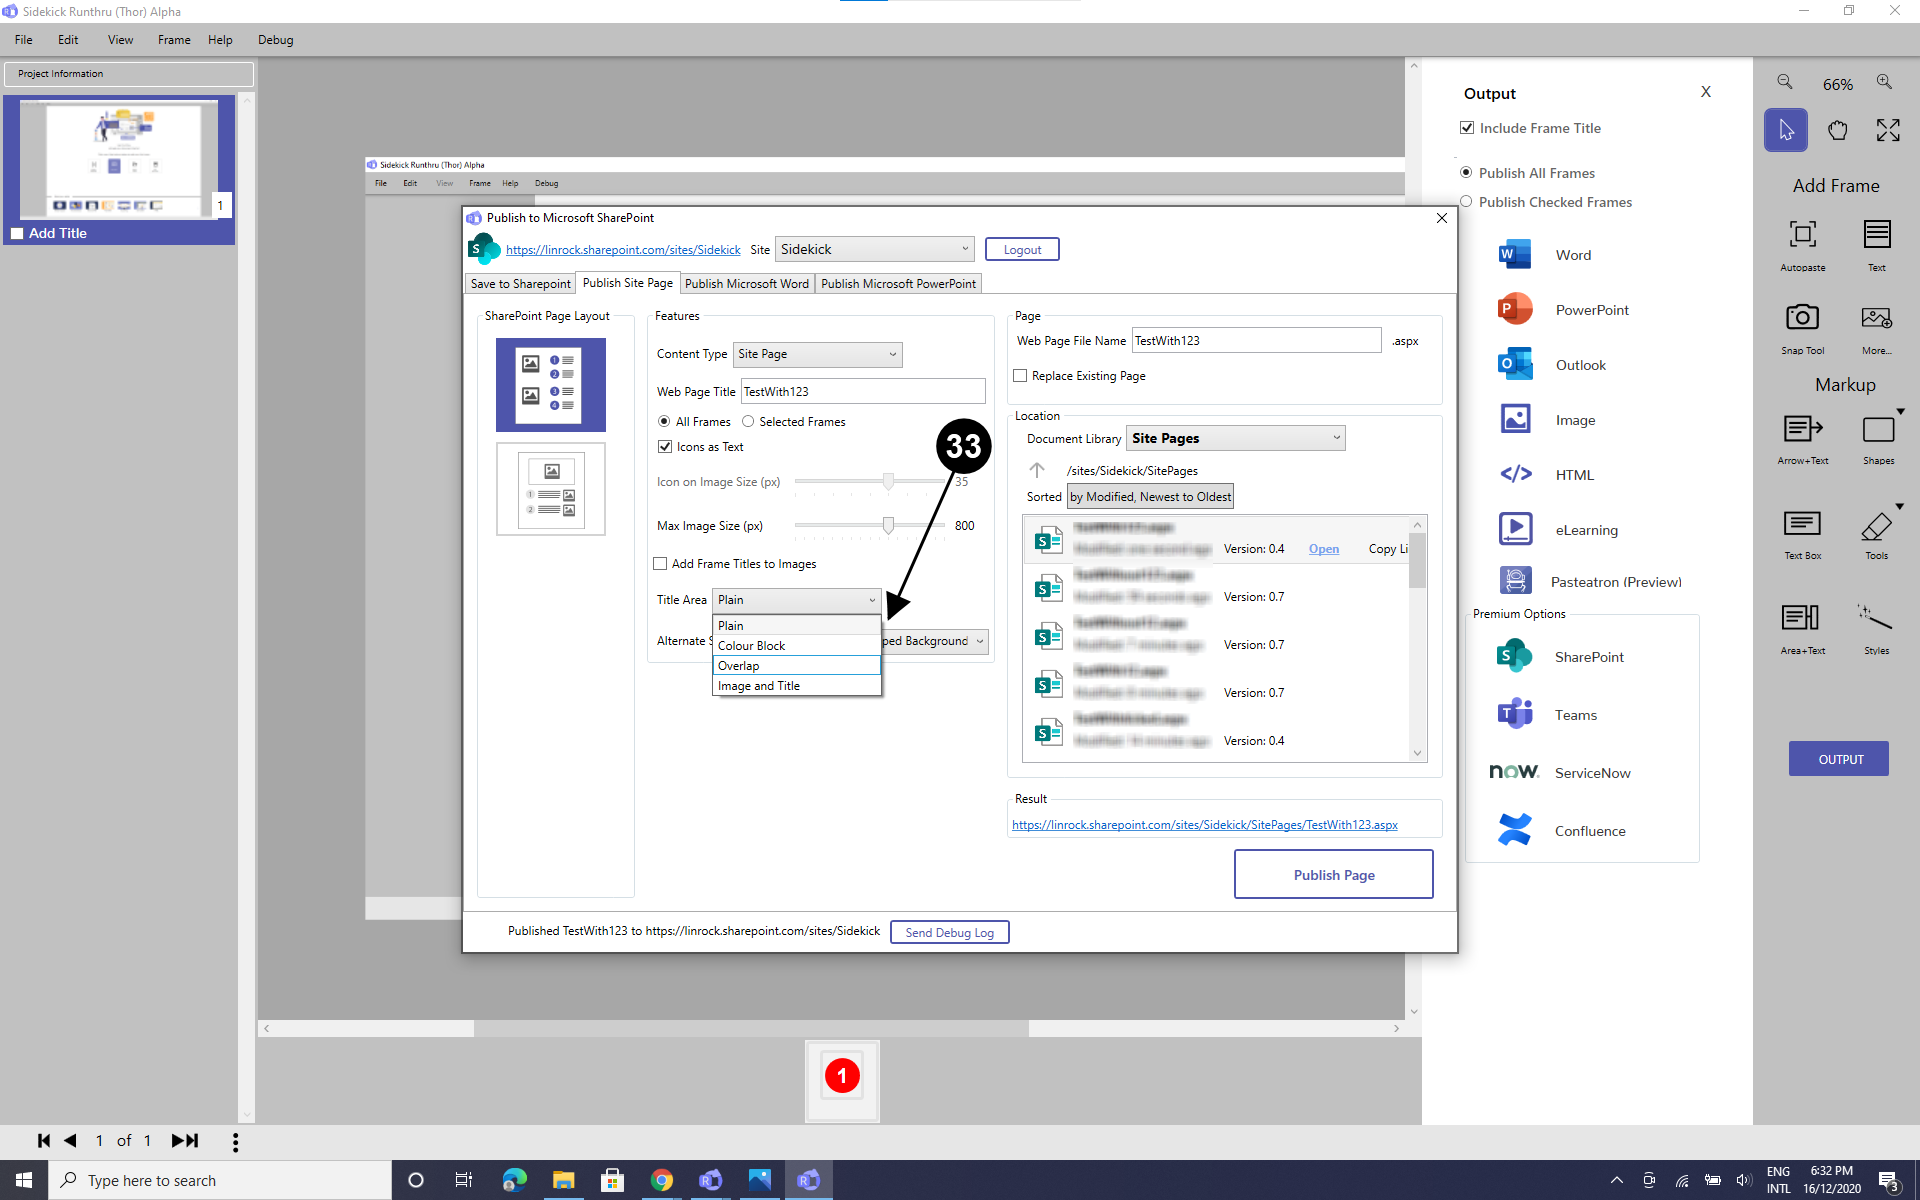

Choose the format of the 'Title Area' here.
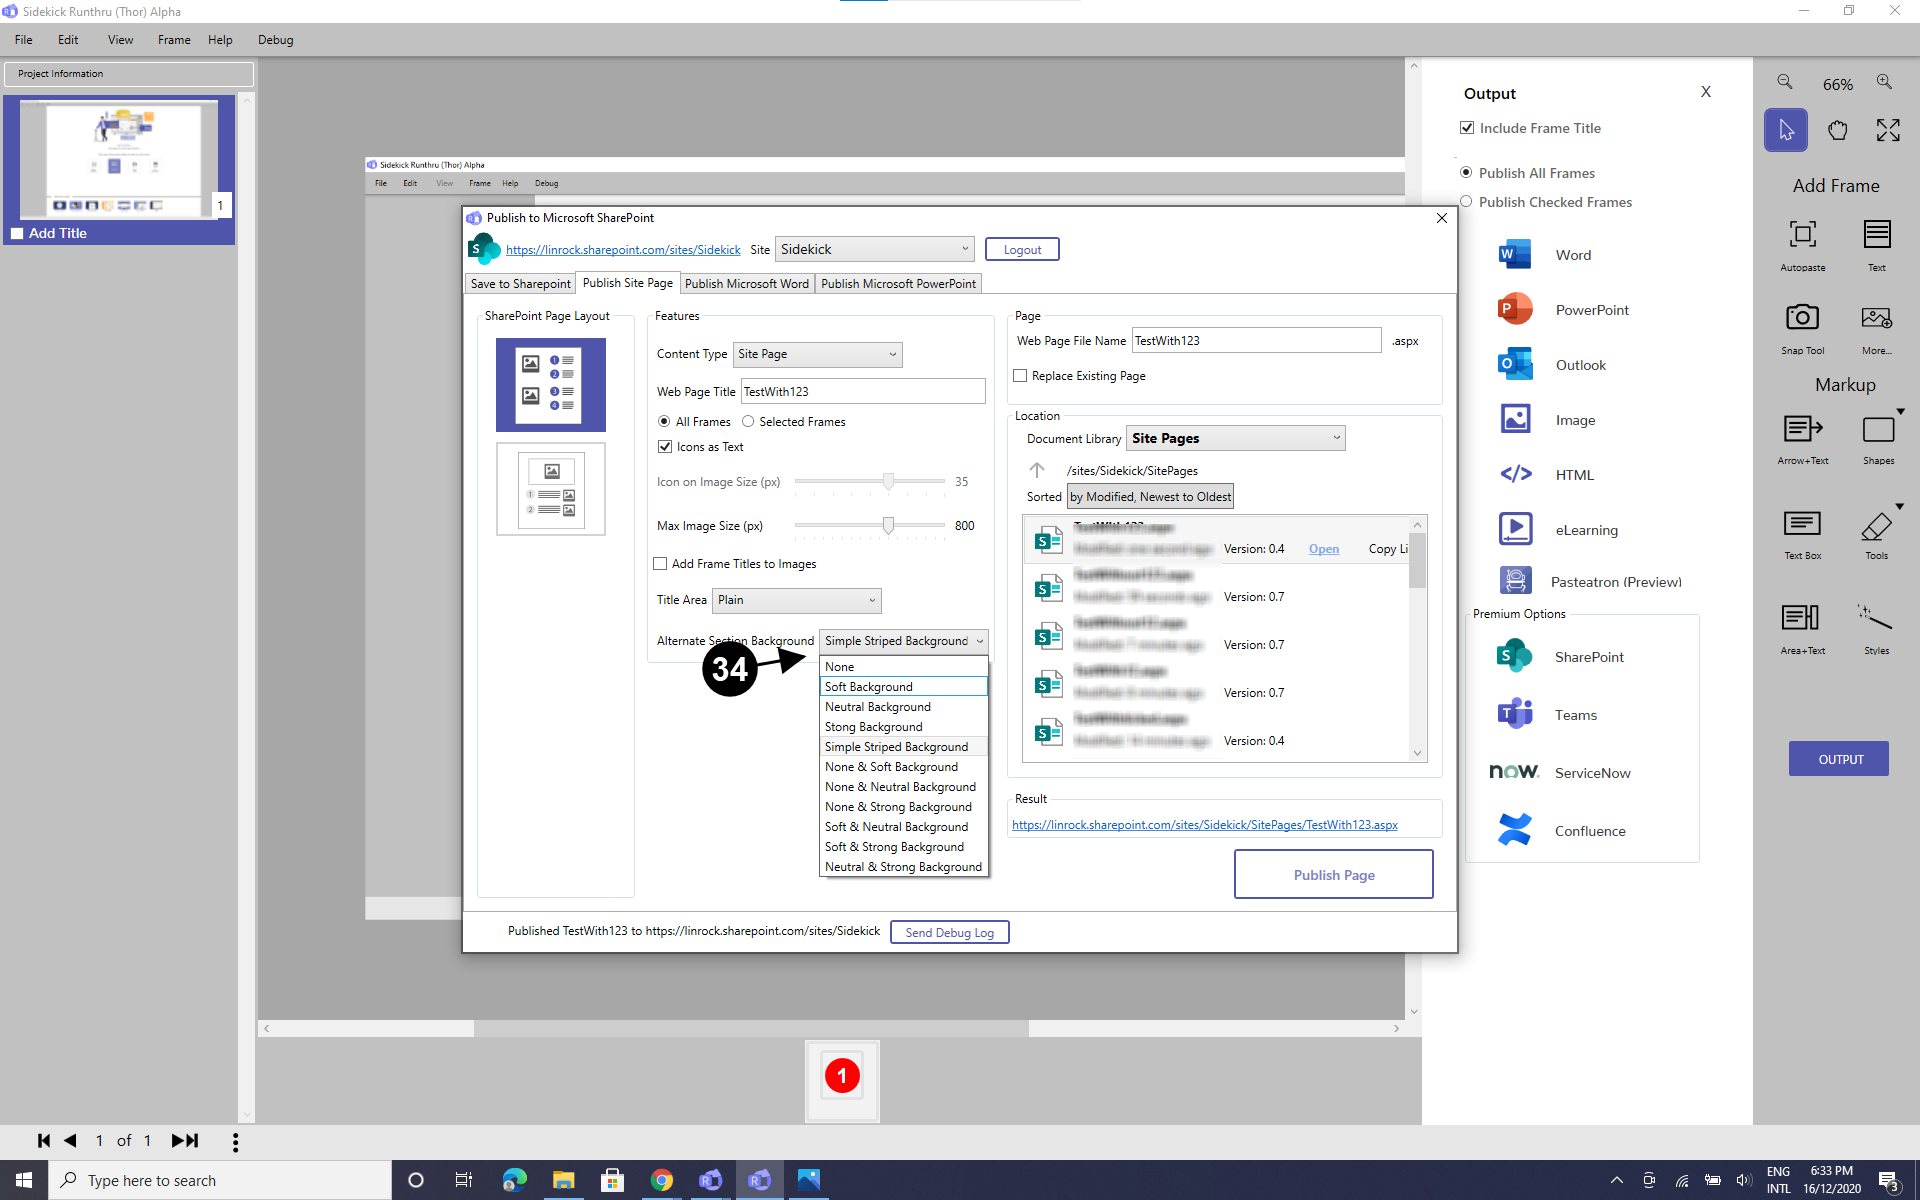

Here you can change the background of the page for when it is published in SharePoint.
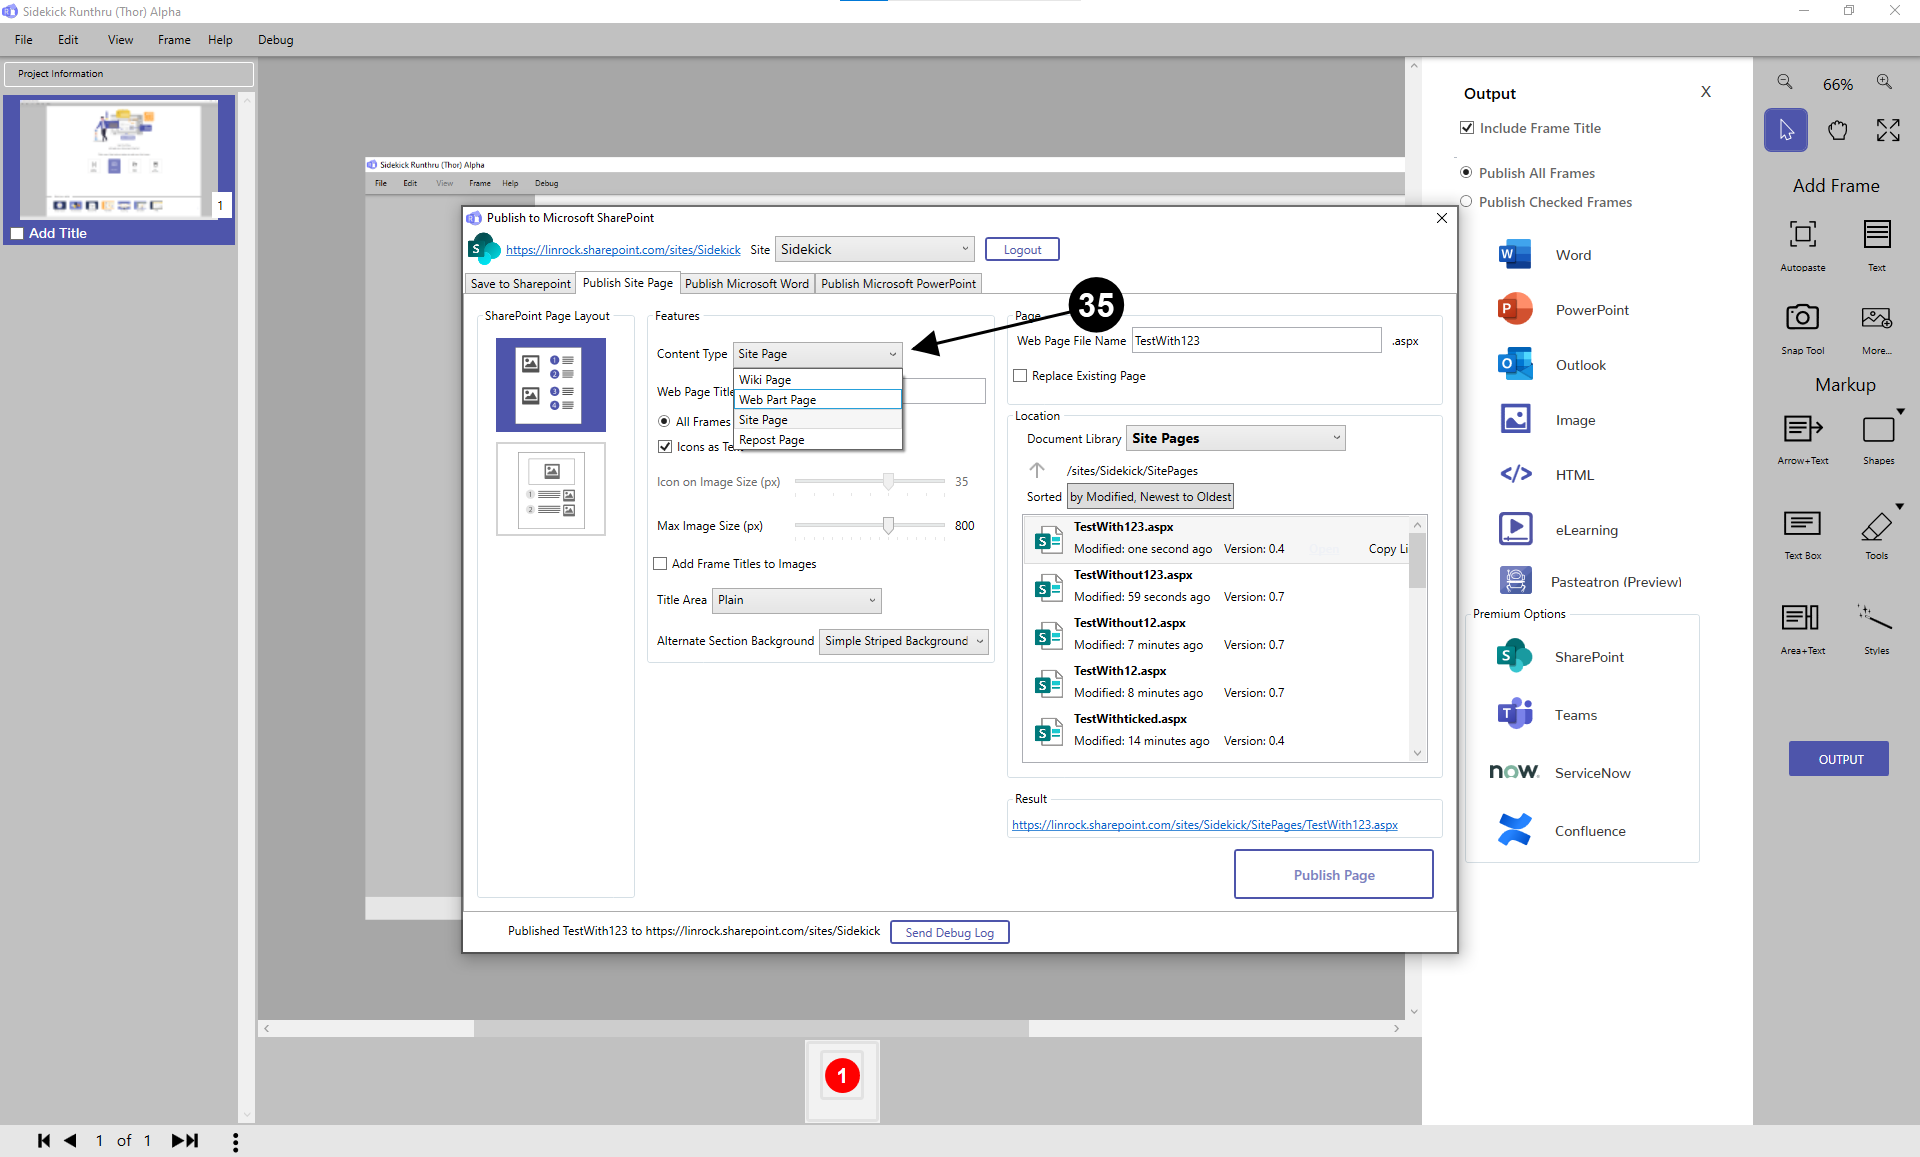

The SharePoint Administrator can define different 'Content Types'. A content type is a reusable collection of metadata (columns), workflow, behaviour, and other settings for a category of items or documents in a SharePoint Server list or document library.
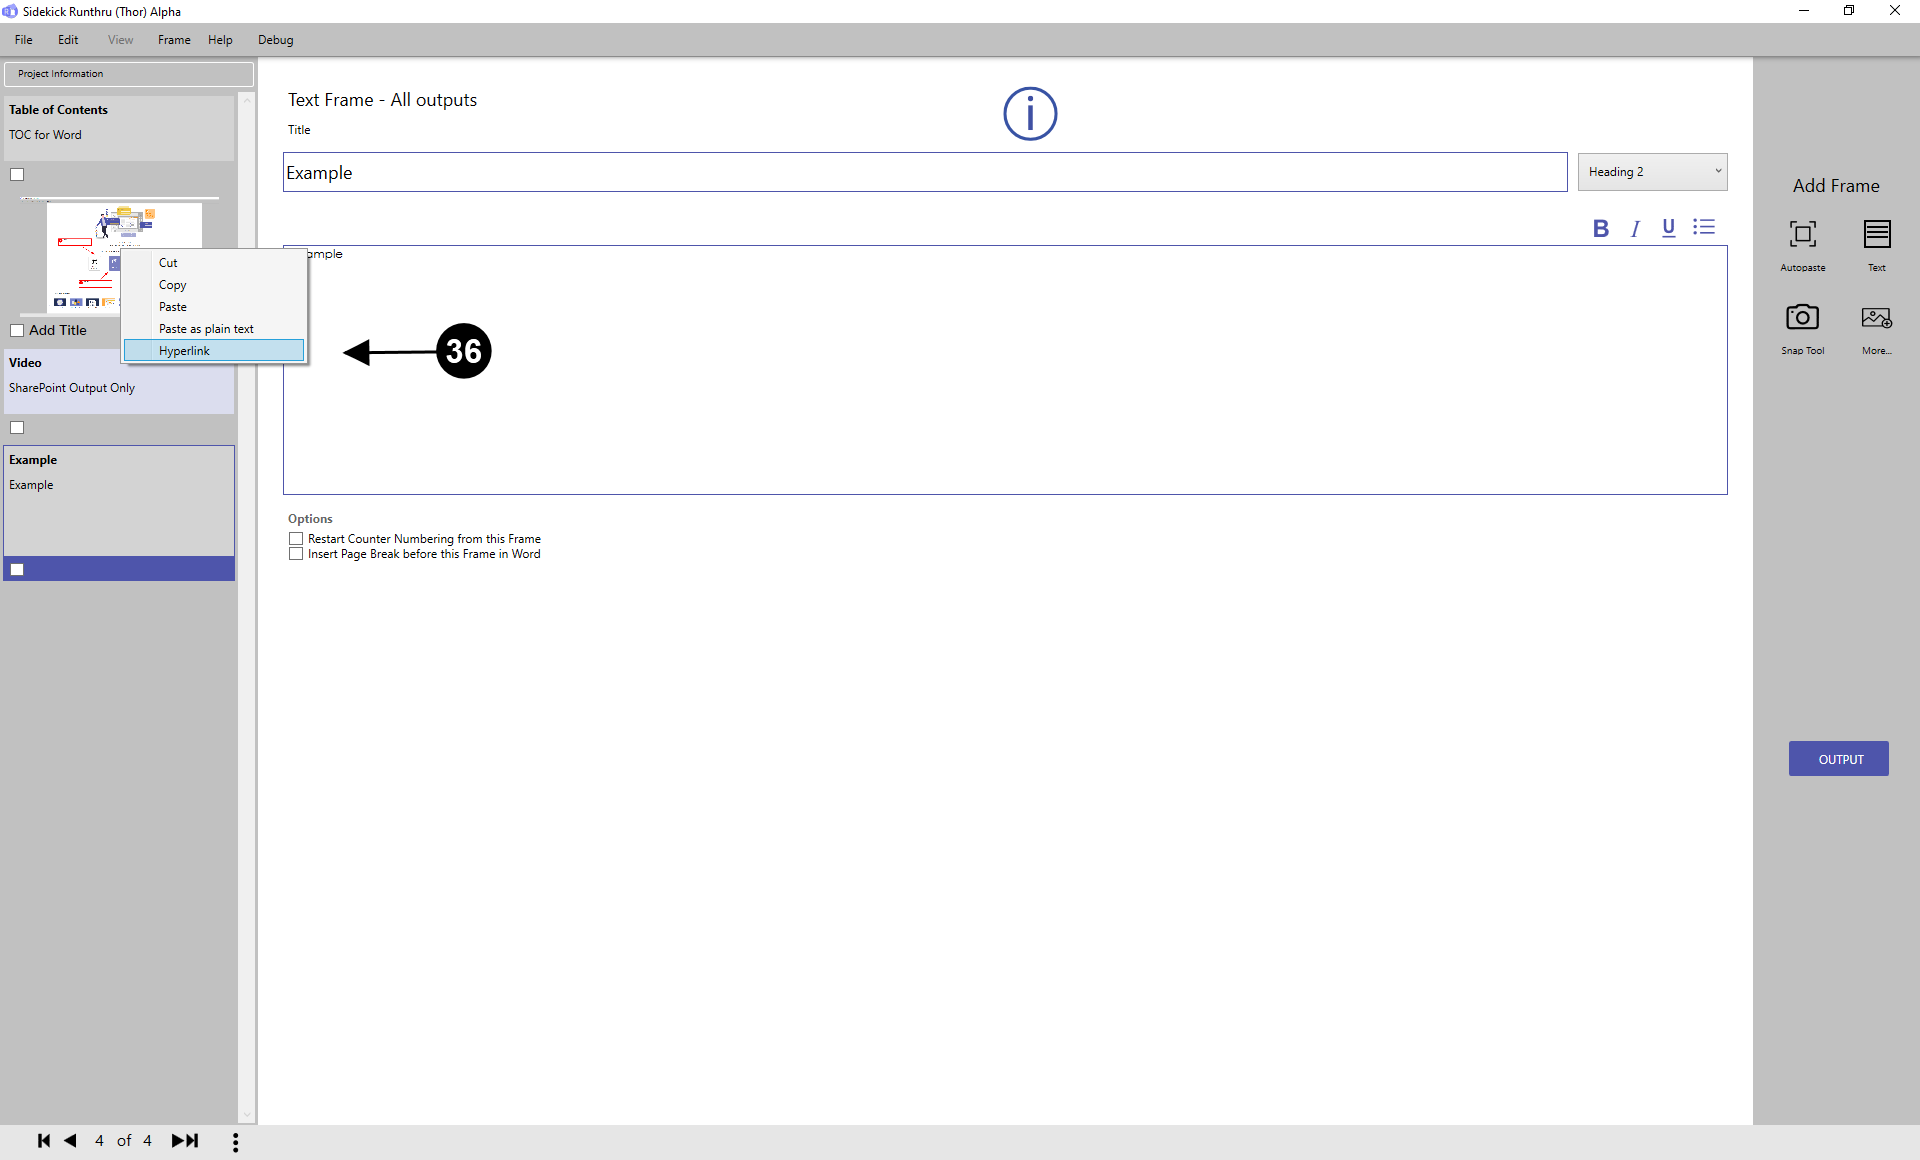

You can also hyperlink to other SharePoint documents.

Highlight the text you want to hyperlink, right click, and press on 'Hyperlink'.
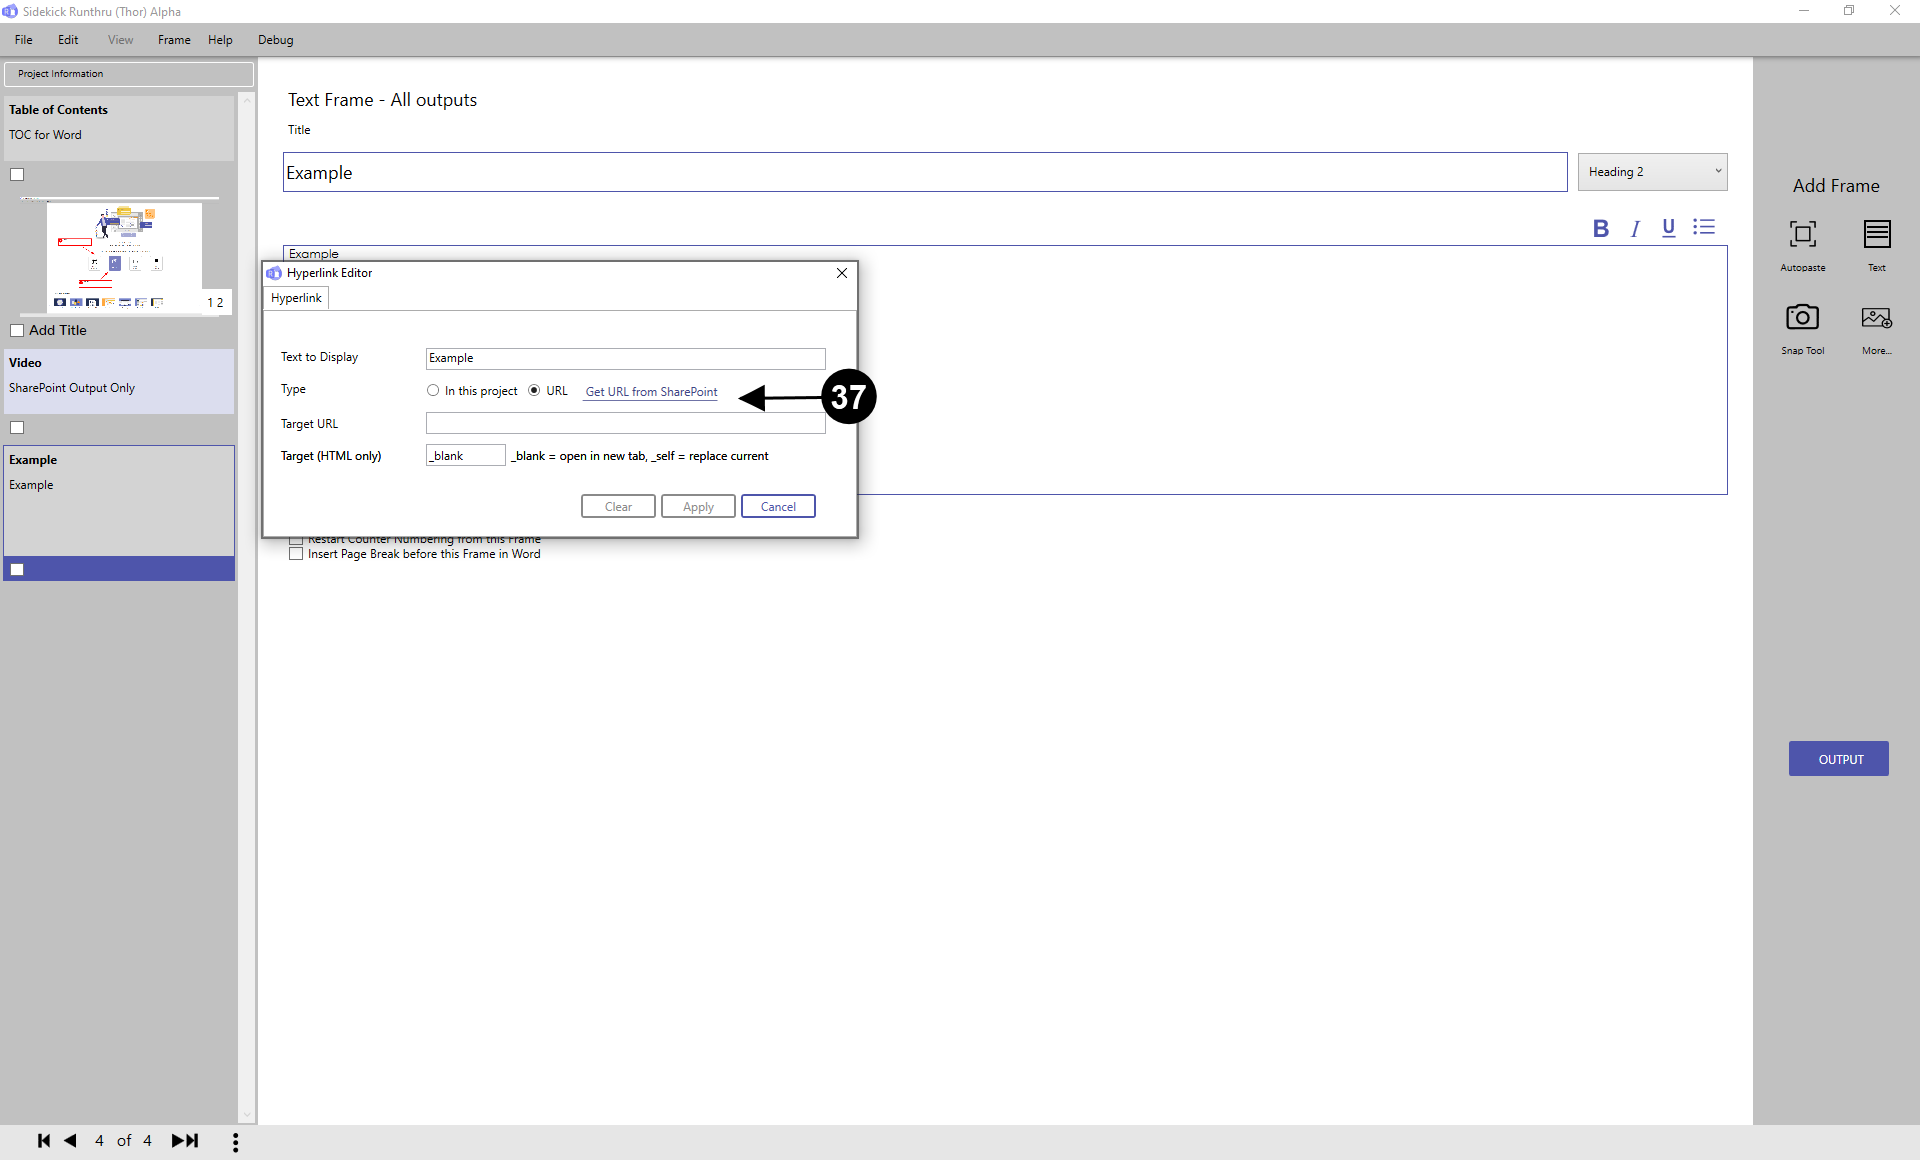

Press 'Get URL from SharePoint'.
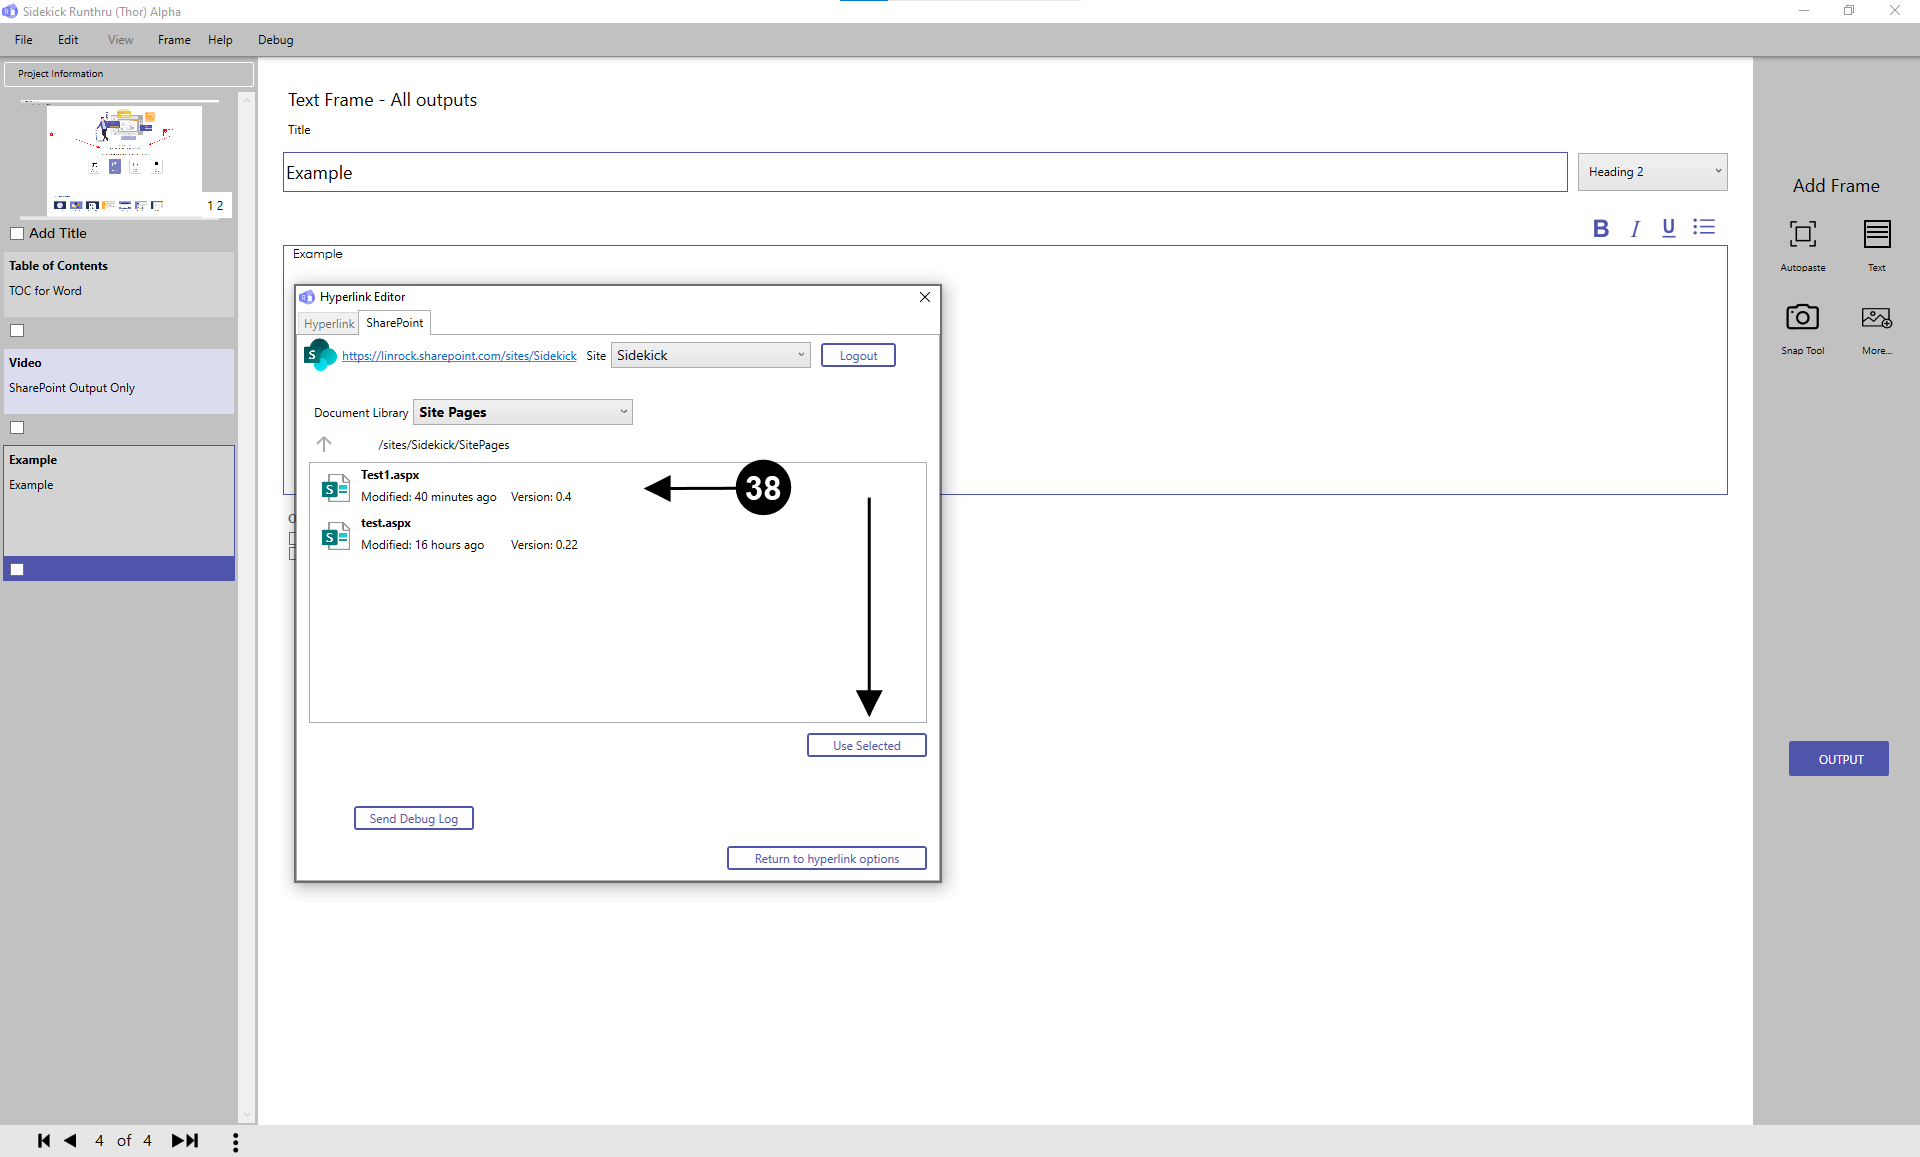

Then select a document and then click 'Use Selected'.
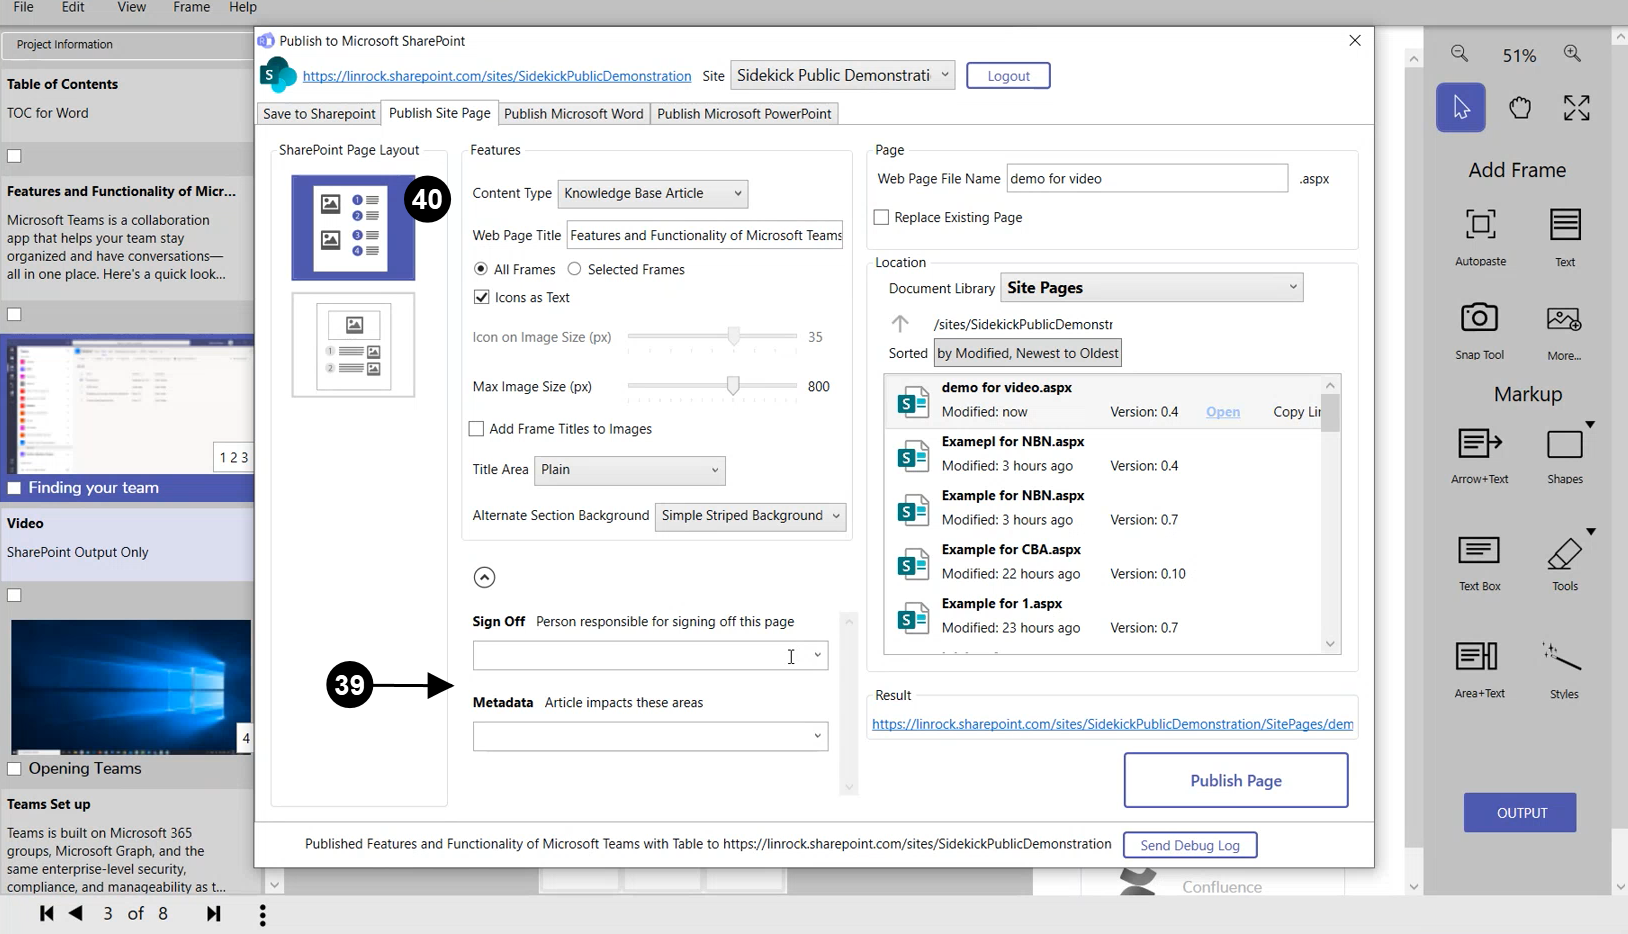

These two options allow the site to be linked to other people and areas. The SharePoint Administrator can make a person responsible to 'Sign Off'. Furthermore, 'Metadata' is like a 'hashtag', although in SharePoint it is known as a 'Term'. This allows you to classify, display, search for, and customise your SharePoint experience.

Here is an example of the 'Content Type' 'Knowledge Base Article' which the SharePoint Administrator can set up.
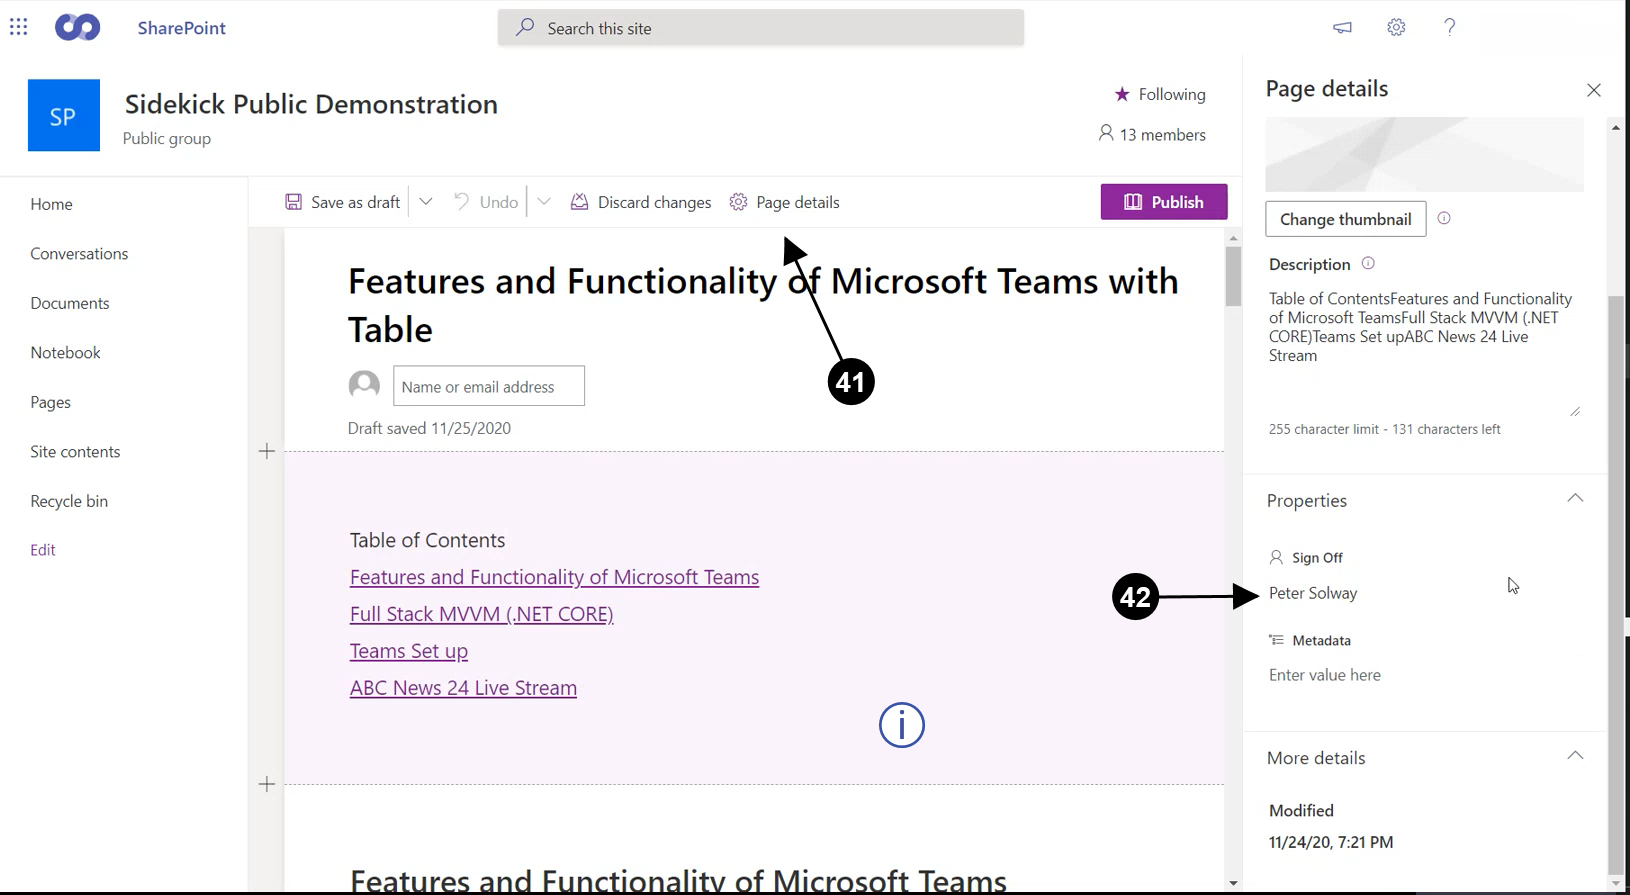

Click 'Page details'.

See here the person that was allocated as responsible in Runthru to 'Sign Off' and also the 'Metadata' field.

You can also manually change the allocated person to 'Sign Off' and the 'Metadata' in SharePoint.